
WS Pipeline (Addon)
The Addon:
The WS Pipeline addon is the main Pipeline management addon for the WS Pipeline. It can be interfaced with from the VSE inside of Blender, and is meant to be used in conjunction with the VSE itself.
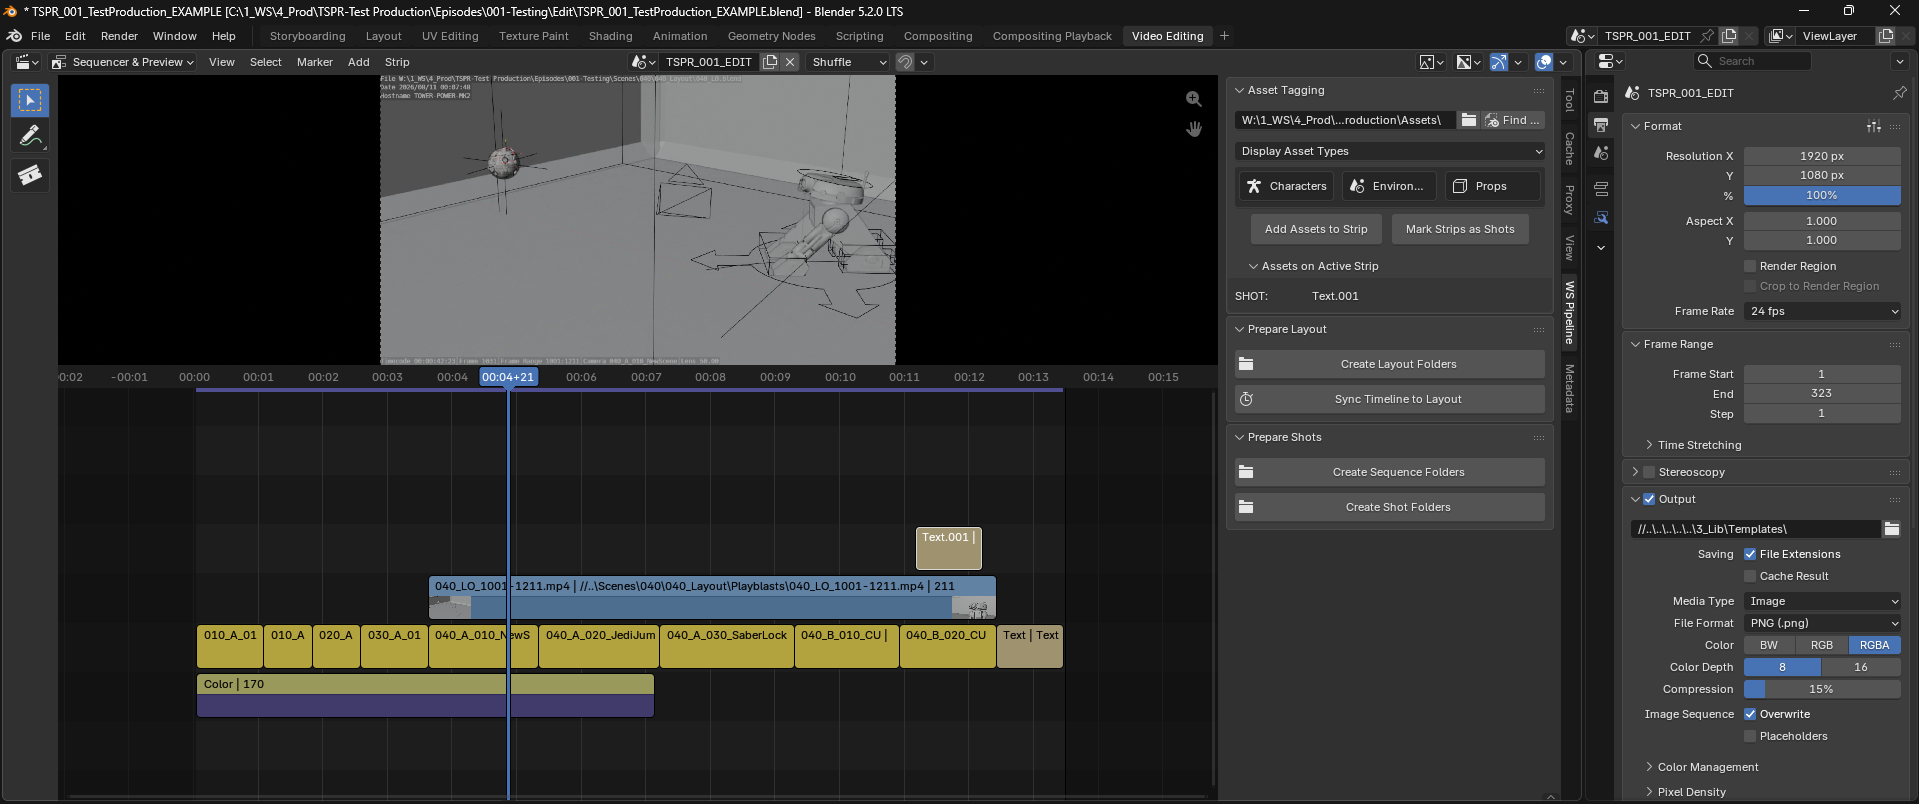
To access the addon, open the Sidebar (N-panel) in either of the Video Sequencer windows.
Preferences Menu:
Before diving into using the addon, there are some settings in Preferences that should be double-checked.
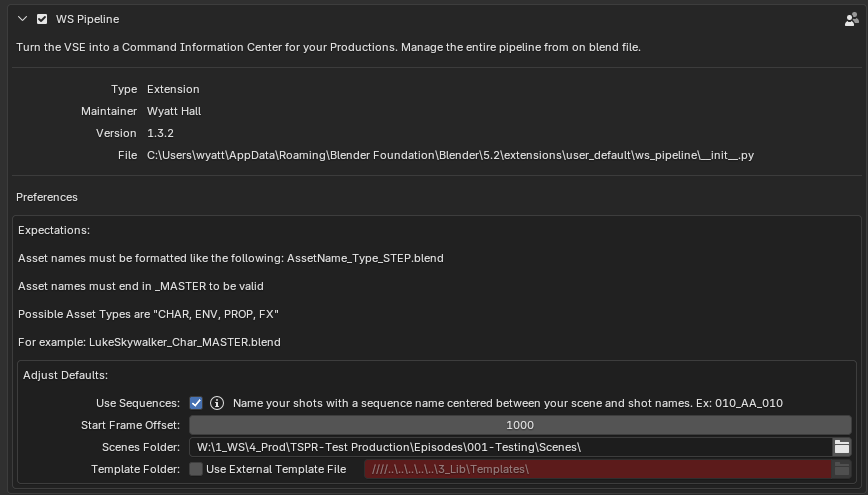
In addition to a quick reference for Asset File naming conventions, there are a series of defaults that can be tailored to your desired specifications.
- Use Sequences: When true the addon will assume your shots have a Sequence identifier between Scene and Shot identifiers.
Ex: 010_A_010 where 'A' is the Sequencer identifier. - Start Frame Offset: When generating the Layout and Shot files, the start frame will be offset by this amount.
- Scenes Folder: This is the folder in which all Layout and Shot folders and files will be created.
- Template Folder: If you want to use your own shot templates, you can point the addon to an external folder of your choosing. By default the addon uses its own internal templates.
Naming Shots:
The Pipeline will assume that your shots are already named correctly. Be sure that you set the name of the shot in the "Name" field of the strip properties, and not in the "text" field.
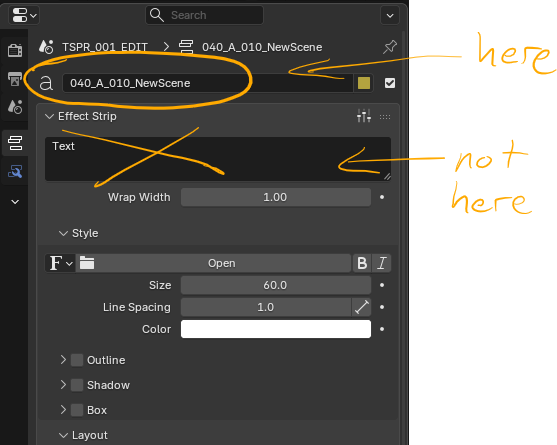
The Strip Name is used to name shot files and folders. The Text field may hold any information (like a description of the shot), and will not be used in the pipeline.
Any of the following shot names are compatible with the pipeline:
- 01_01_00_NewShot
- 010_A_010_NewShot
- Sc01_Seq01_Sh01_New-Shot
- NewScene_NewSeq_NewShot
If you are not using sequences, simply do not include the Sequence identifier between the Scene and Shot.
Tag Strips as Shots:
You may have any number of strips present in your VSE timeline, but the addon needs to know which specific strips are actually Shots.
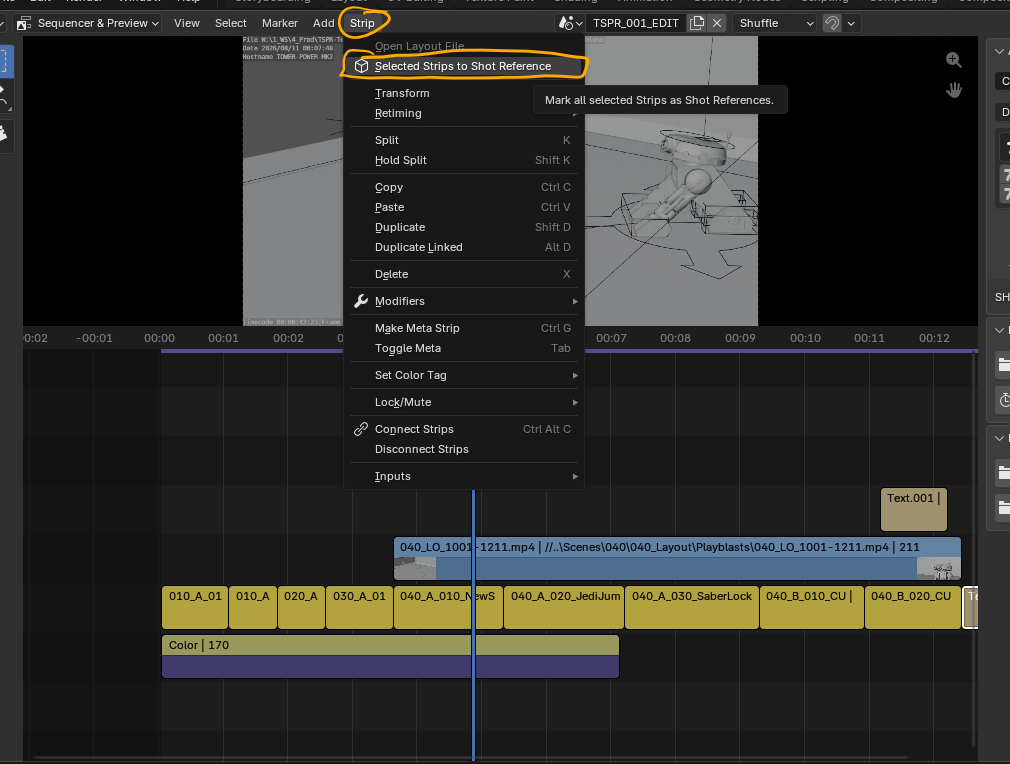
You may select any number of strips, right click (or 'w') and select "Selected Strips to Shot Reference"
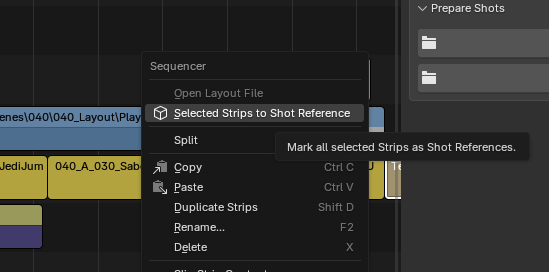
You may also press the button in the addon called "Mark Strips as Shots"
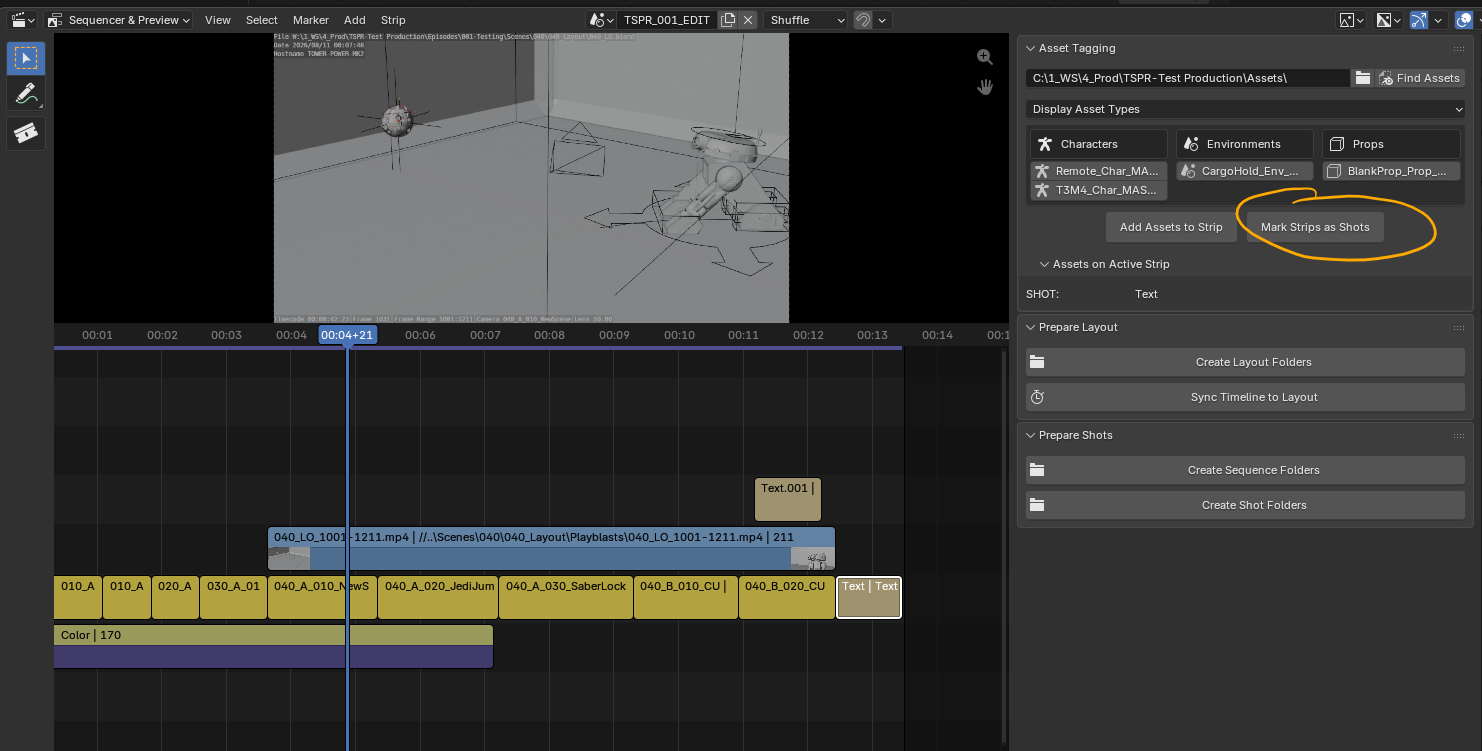
They all do the same thing (todo: give them the same name)
Asset Tagging:
To start Asset Tagging, connect the addon to your project's Assets folder.

At the top bar of the Asset Tagging section, browse to a folder that contains all the Assets for your project. Then, click "Find Assets"
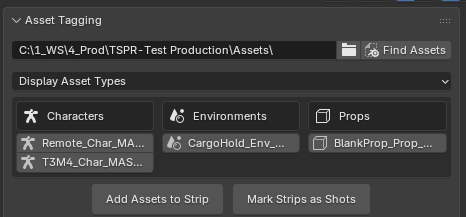
The Asset Type fields will show pipeline-valid files that include "_MASTER" in their names.
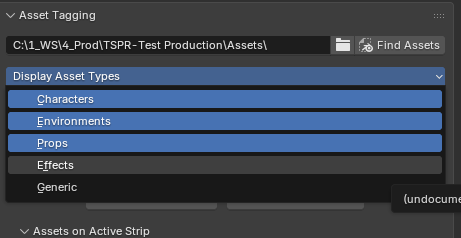
You may reveal additional Asset Types from the dropdown above the menu.
To tag a strip with assets, first select a strip or strips.
Use Shift+Click in the Asset Tagging menu to select one or several assets.
Finally, click "Add Assets to Strip". The selected assets will be tagged on any selected strips.
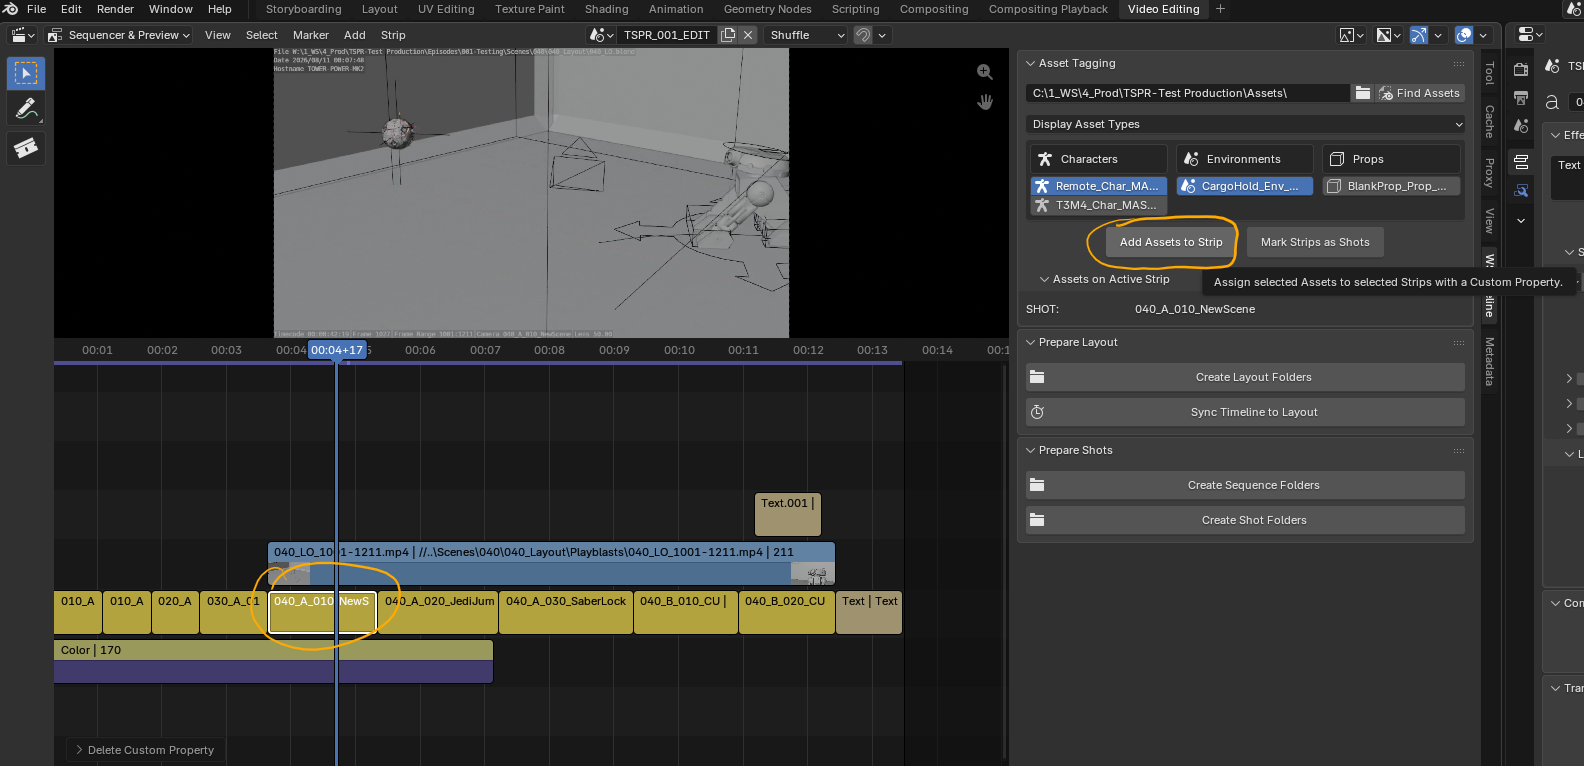
The active strip's tagged assets will appear in the "Assets on Active Strip" dropdown below the Asset Tagging menu.
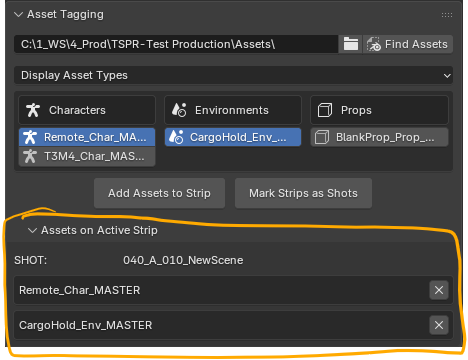
Progress through your entire timeline until you've tagged every strip with the relevant assets.
Generating Layout Files:
Once you've completed your storyboard edit, you may use the addon to quickly and automatically generate Layout files and folders.
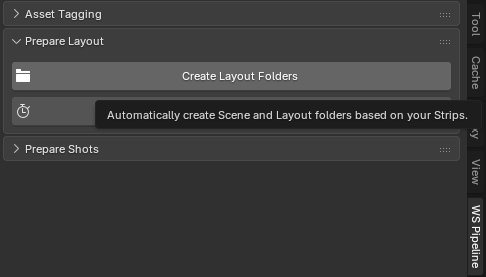
This is meant to be a one-click solution. Click it, and it will create the folder hierarchy within your Scenes folder, as well as set up Layout blend files. Any assets that were tagged to a scene will automatically be linked into the Layout blend file.
The template for this file is included internally in the addon. You may use an external file as a template by setting it in Preferences.
Update Timeline to Layout Changes:
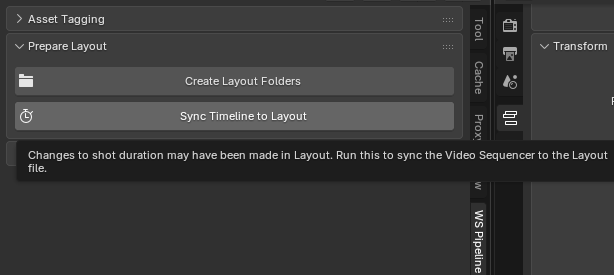
After a Layout artist has made changes to shot timings or scene duration in a Layout file, you may press "Sync Timeline to Layout" to automatically read the Layout file and apply the changes to the VSE Timeline.
Create Sequence Files:
Todo
Create Shot Files:
Todo
Shot Management(?)
Todo
No comments to display
No comments to display