Look Dev Guides
A Collection of guides and tutorials on Look Dev techniques
Masking lineart with Vertex Colors in PSoft Pencil+
Have you ever been trying to apply lineart to a character, and run into this issue? Certain contours are getting traced, creating undesirable lines that look bad at extreme angles.
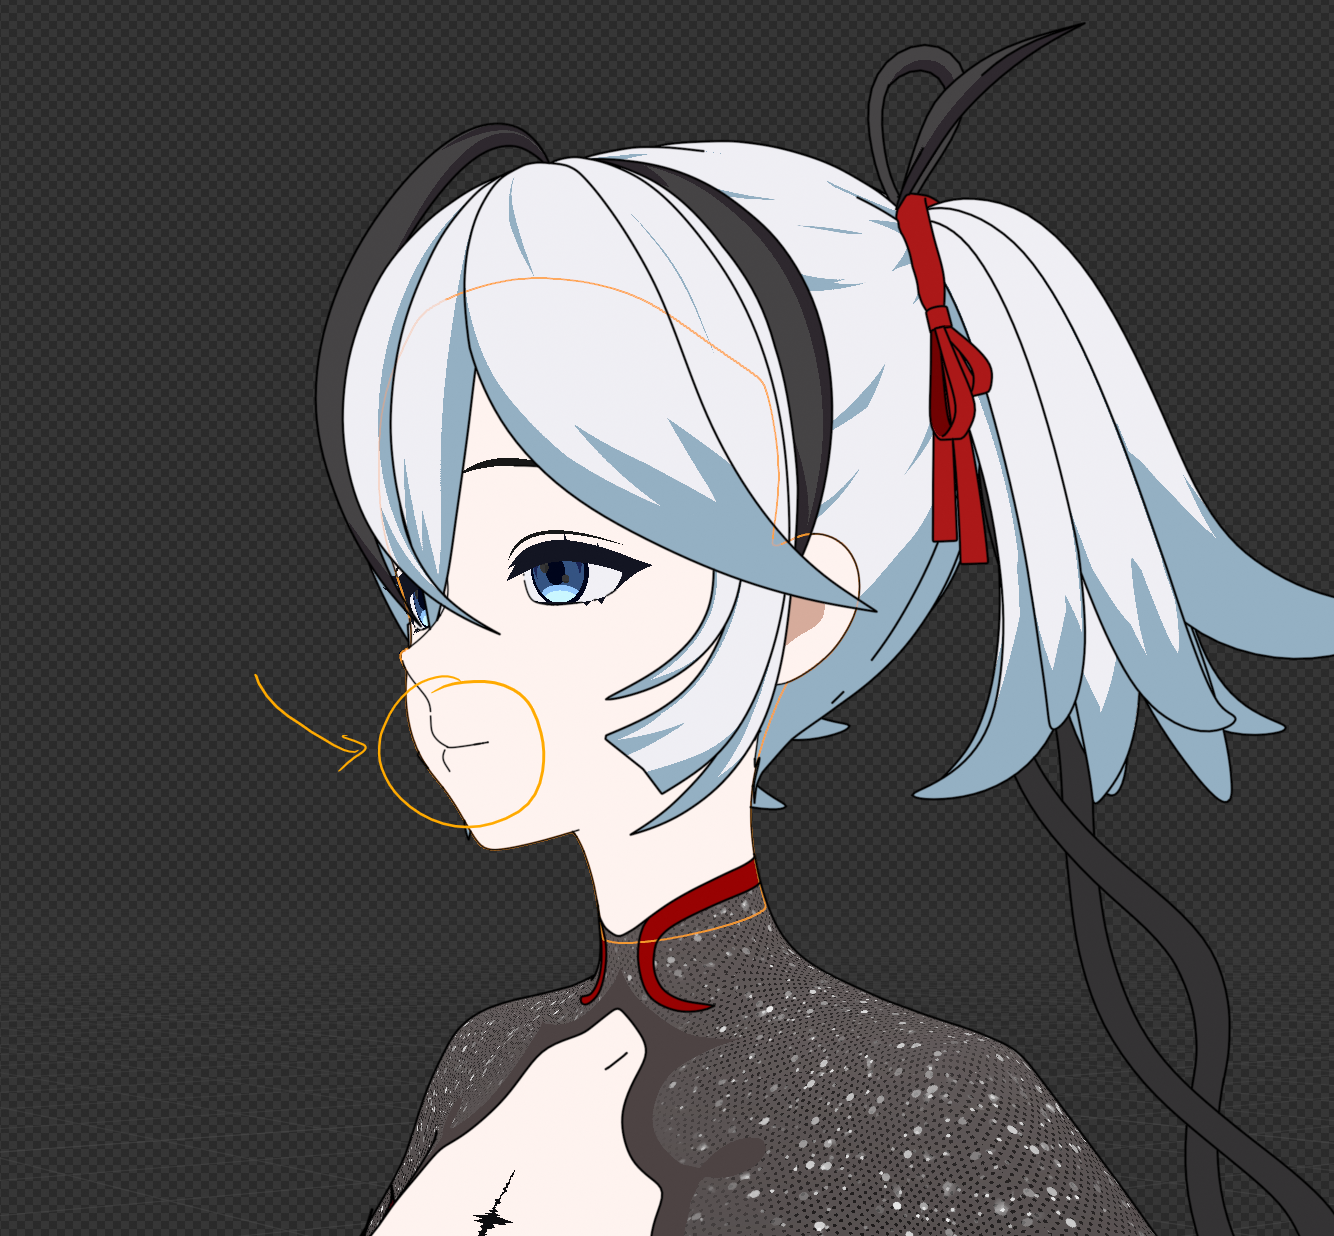
This guide will help you solve this problem. To do it, we'll create Vertex Color Attributes and apply them as a Size Map in PSoft.
I'm going to assume you already have PSoft lineart set up on your character. If you don't (todo: make a PSoft setup guide?)
Step 1:
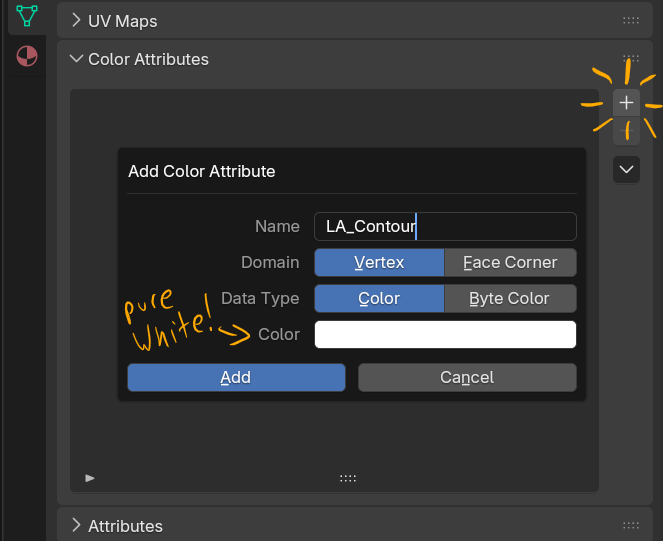
With your character's face object (or other object that you want to modify the lines on) selected, Go to the Object Data Properties and add a new Color Attribute.
Call it something like LA_Contour, since we'll be using it to mask the Lineart's Contour lines.
Step 2:
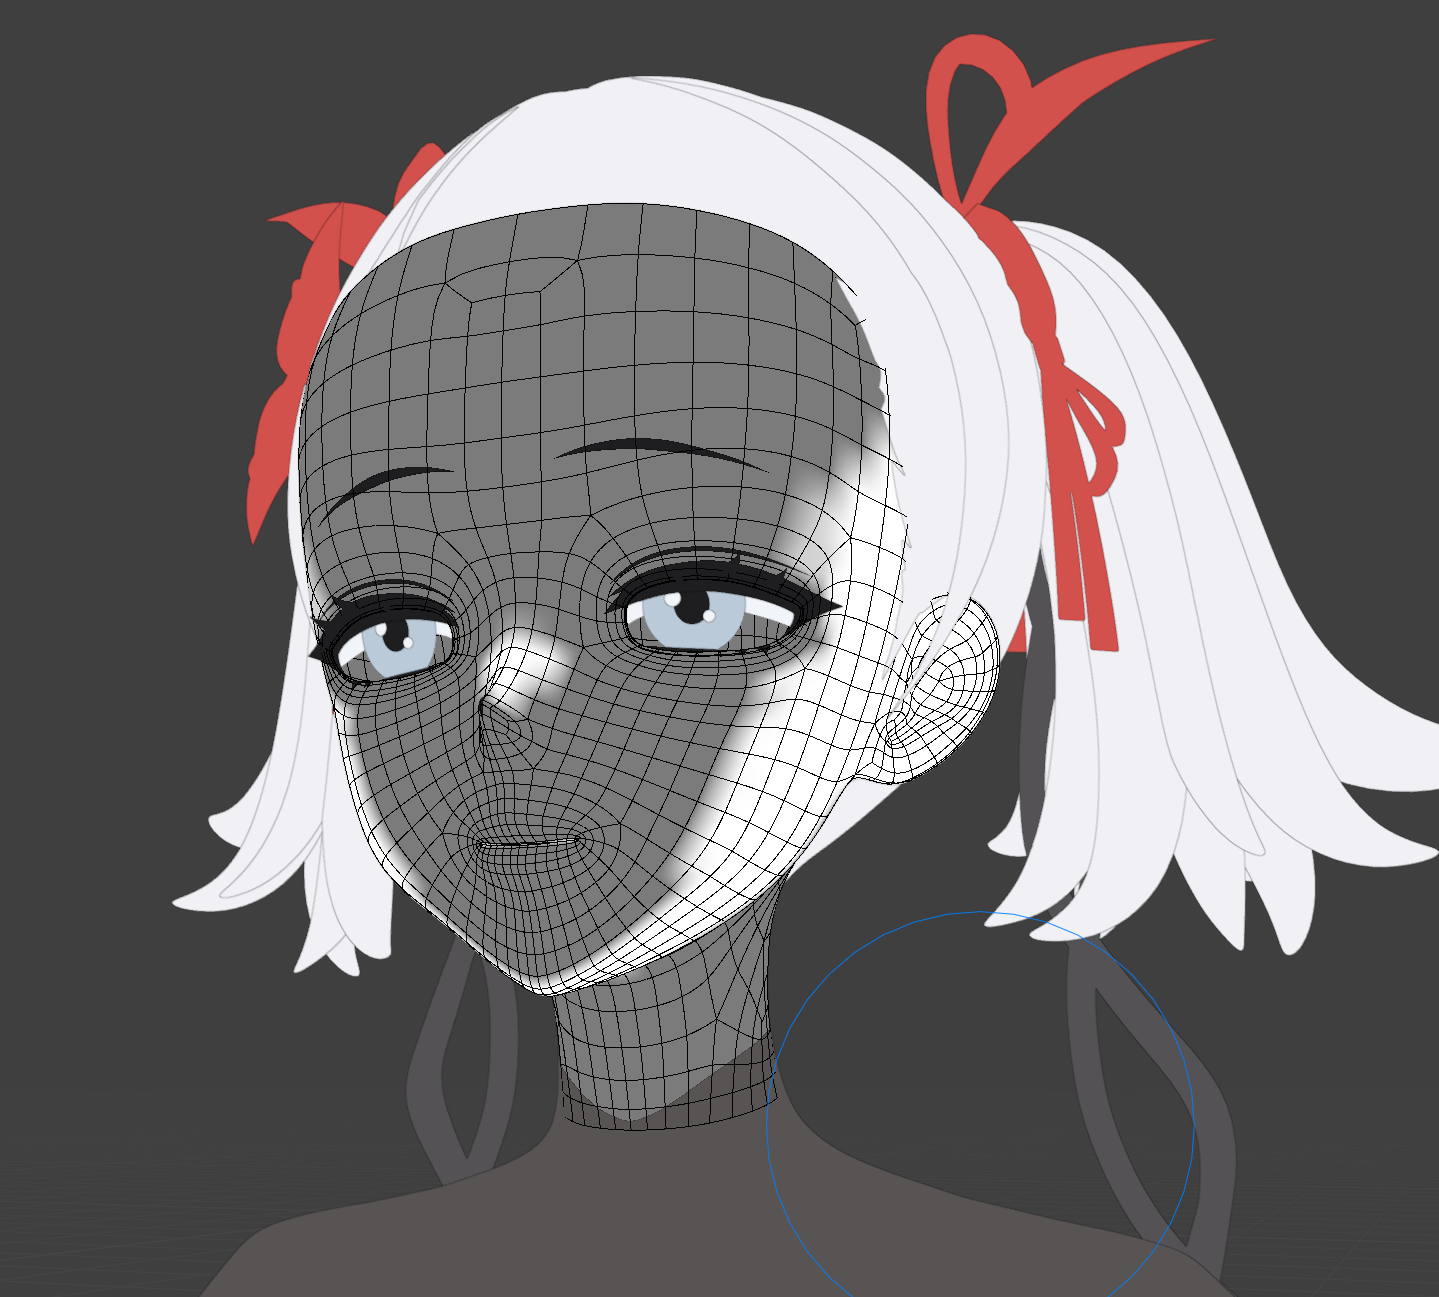
With that Color Attribute selected, go into Vertex Paint mode and paint a mask on your mesh.
White = Yes lines!
Black = No Lines!
Step 3:
Go into the Pencil+ editor and select the Line Set that includes your Face.
Scroll down to the Edge properties, and find the "Object" tab.
Check "Specific Brush Settings."
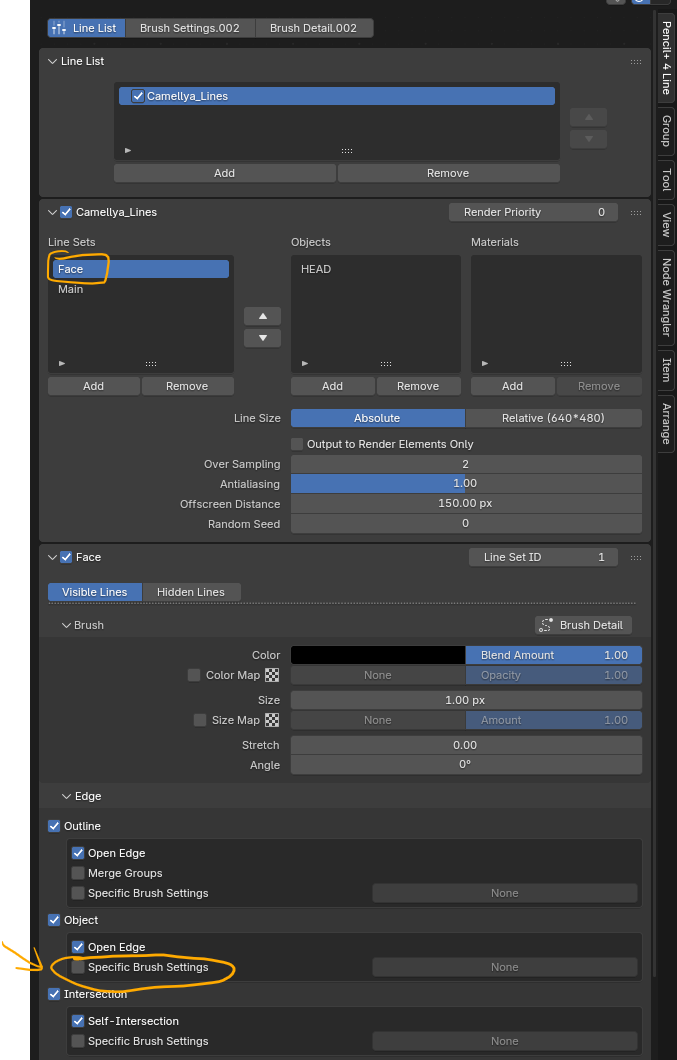
Pencil+ will automatically create a new Brush Settings group for you to edit. Click it to go inside it and do so.

Step 4:
In the Brush Settings, check "Size Map"
If you'd rather have a stroke fade in opacity instead of get thinner as it approaches the masked area, use "Color Map" with opacity set to zero.
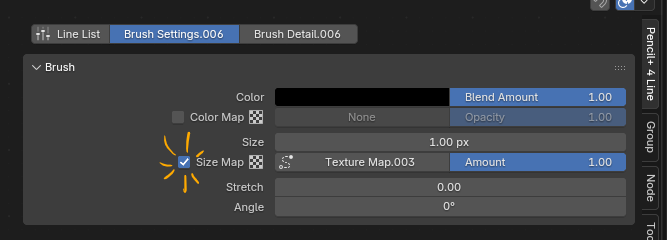
Finally, to define the texture to use, click on "Texture Map"
Step 5:
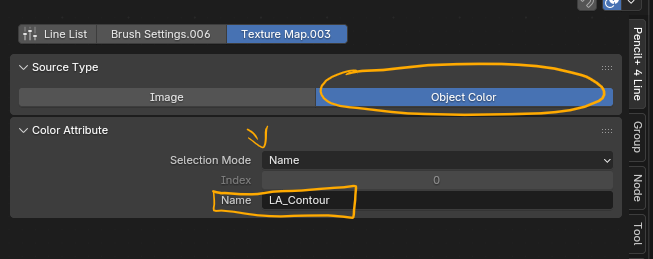
In the Texture Map, switch the Source Type to "Object Color."
Under Color Attribute, set the Selection Mode to "Name" and type in the name of the Color Attribute we made earlier.
Step 6:
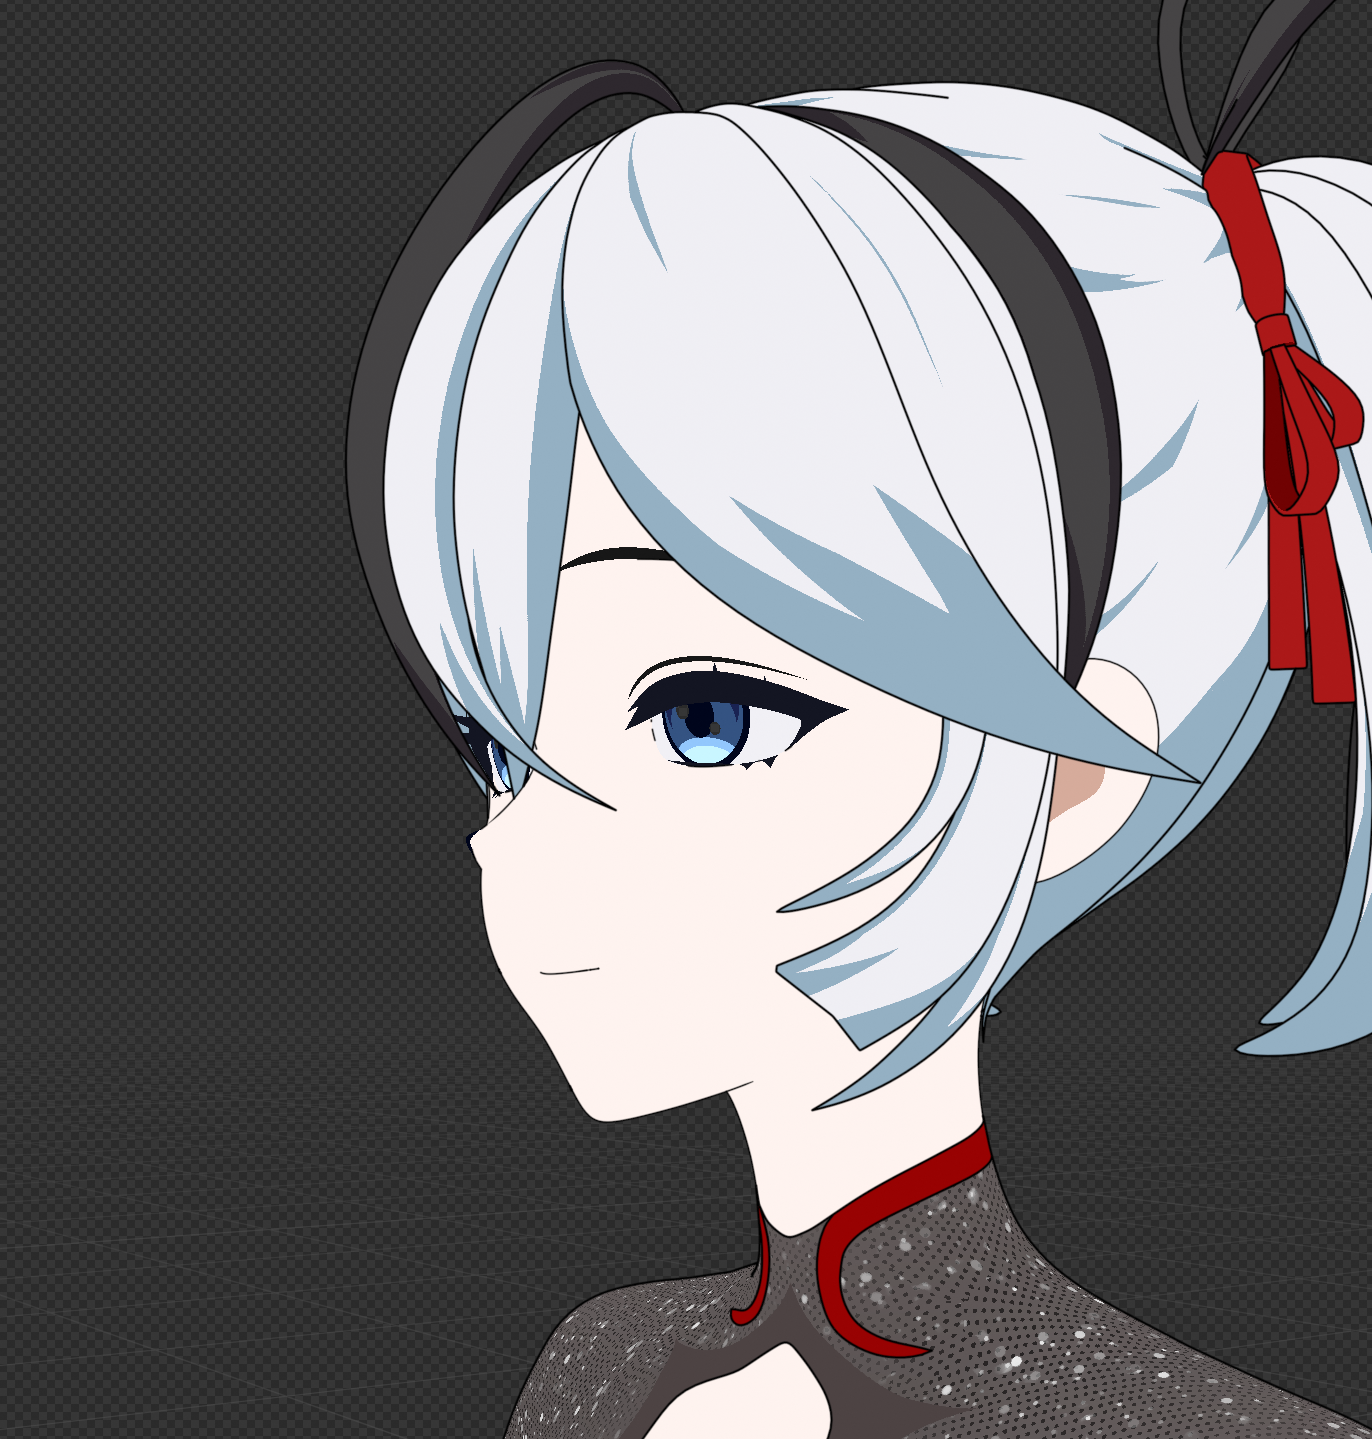
Refresh your viewport preview lines and bask in your glory!
Extra things to consider:
These settings don't actually stop lines from drawing in those undesirable areas, they only make them invisible. For our purposes, that's plenty. But some pipelines may be incompatible with this.
You can also use Vertex Colors in the exact same way presented here to control line thickness. Pencil+ lines get multiplied by whatever value you chose when vertex painting.
ex: Painting a grey value of 0.5 brightness (with 1.0 being the highest) will half the thickness of the line.
You can also use vertex painting to mask Intersection influence.
Using Pencil+'s node editor, you can make one vertex group and Brush Setting apply to several different Line Sets.
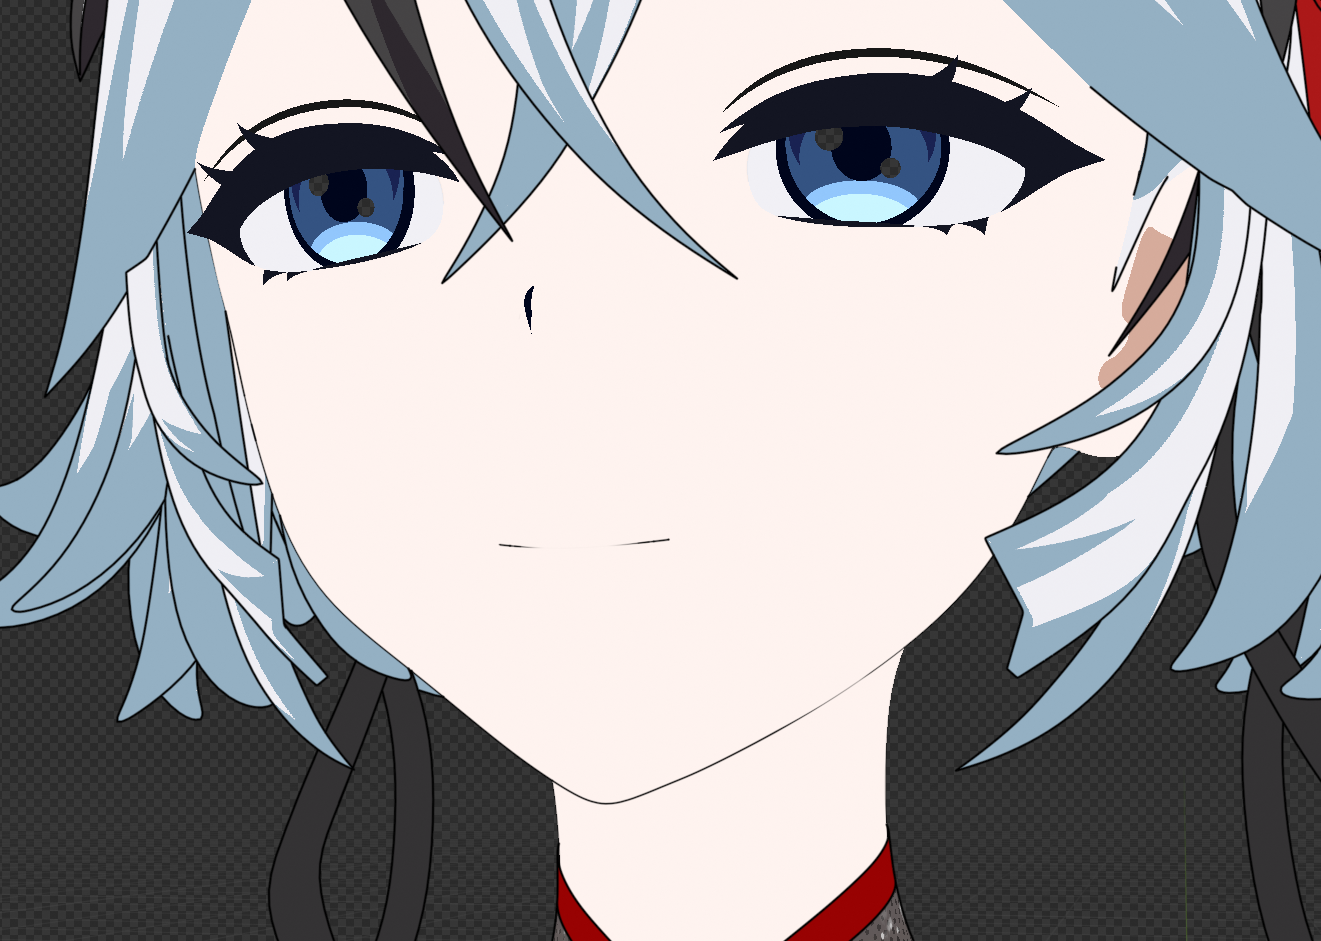
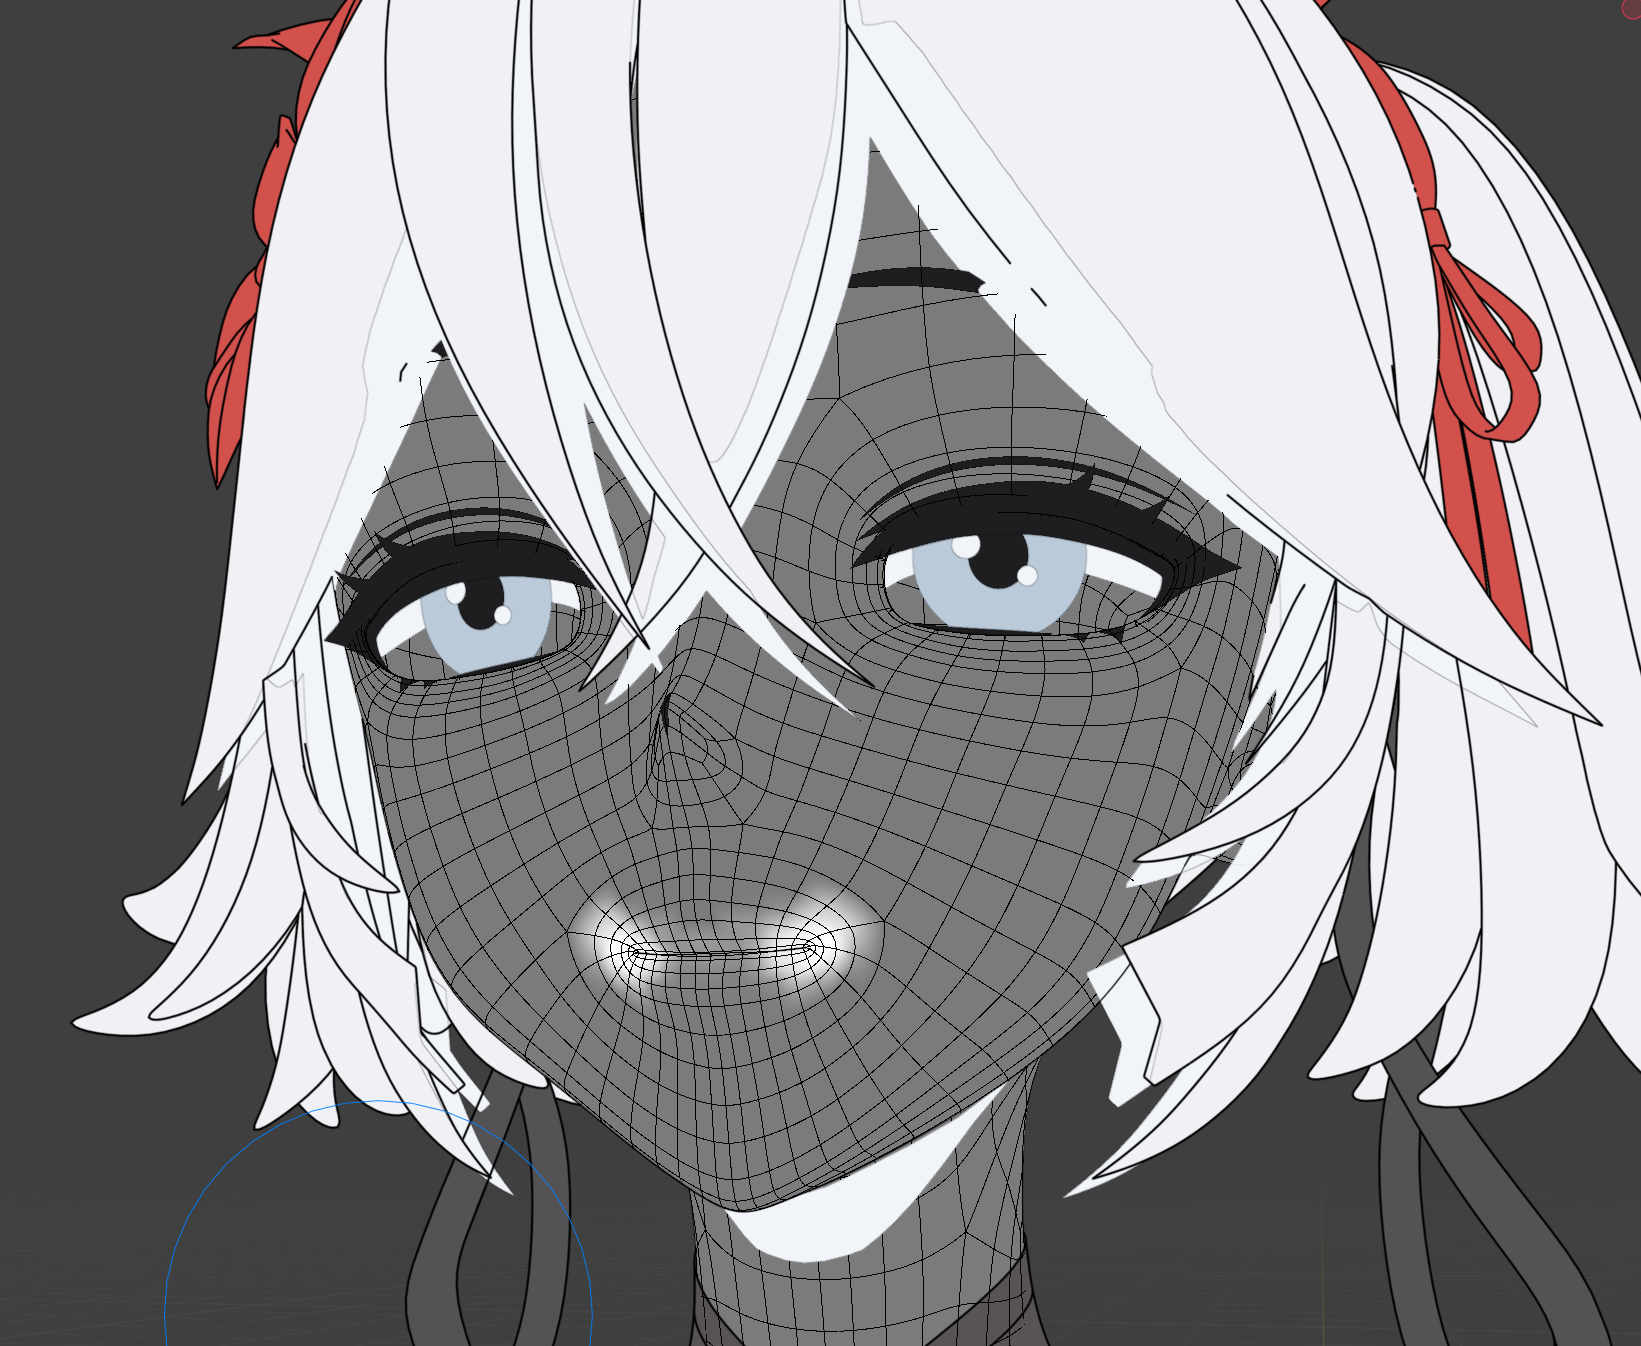
Example:
Here, I've used a Vertex Color Attribute to scale the line thickness higher at the corners of the mouth.
Inner Line Art
Before diving into this method keep in mind that while you're modeling you have to think ahead and place edges where the line art should appear!
So, you have finished modeling and you have to start texturing. First things first we create 2 UV sets. One for the "Texture" (Base color, Shadow, etc.) and one for the "Line Art".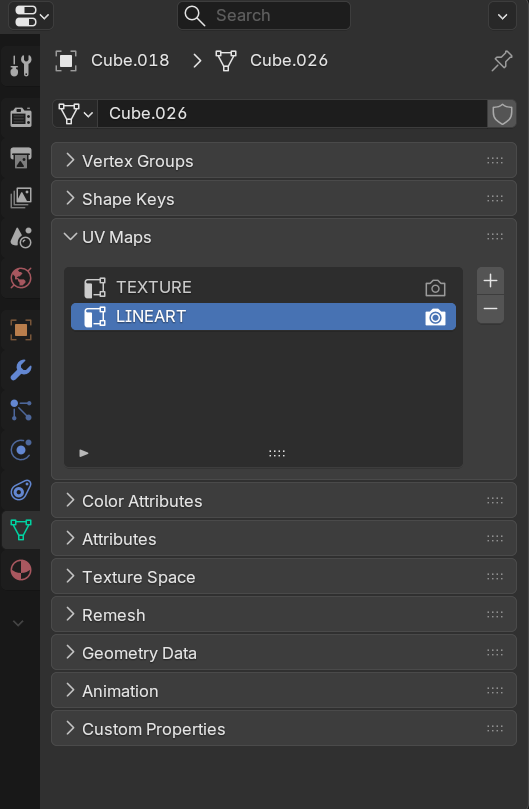
You can unwrap the Geo normally for the "Texture" while we will have to think in "blocks" while unwrapping the Geo for this Inner Line Art Map. 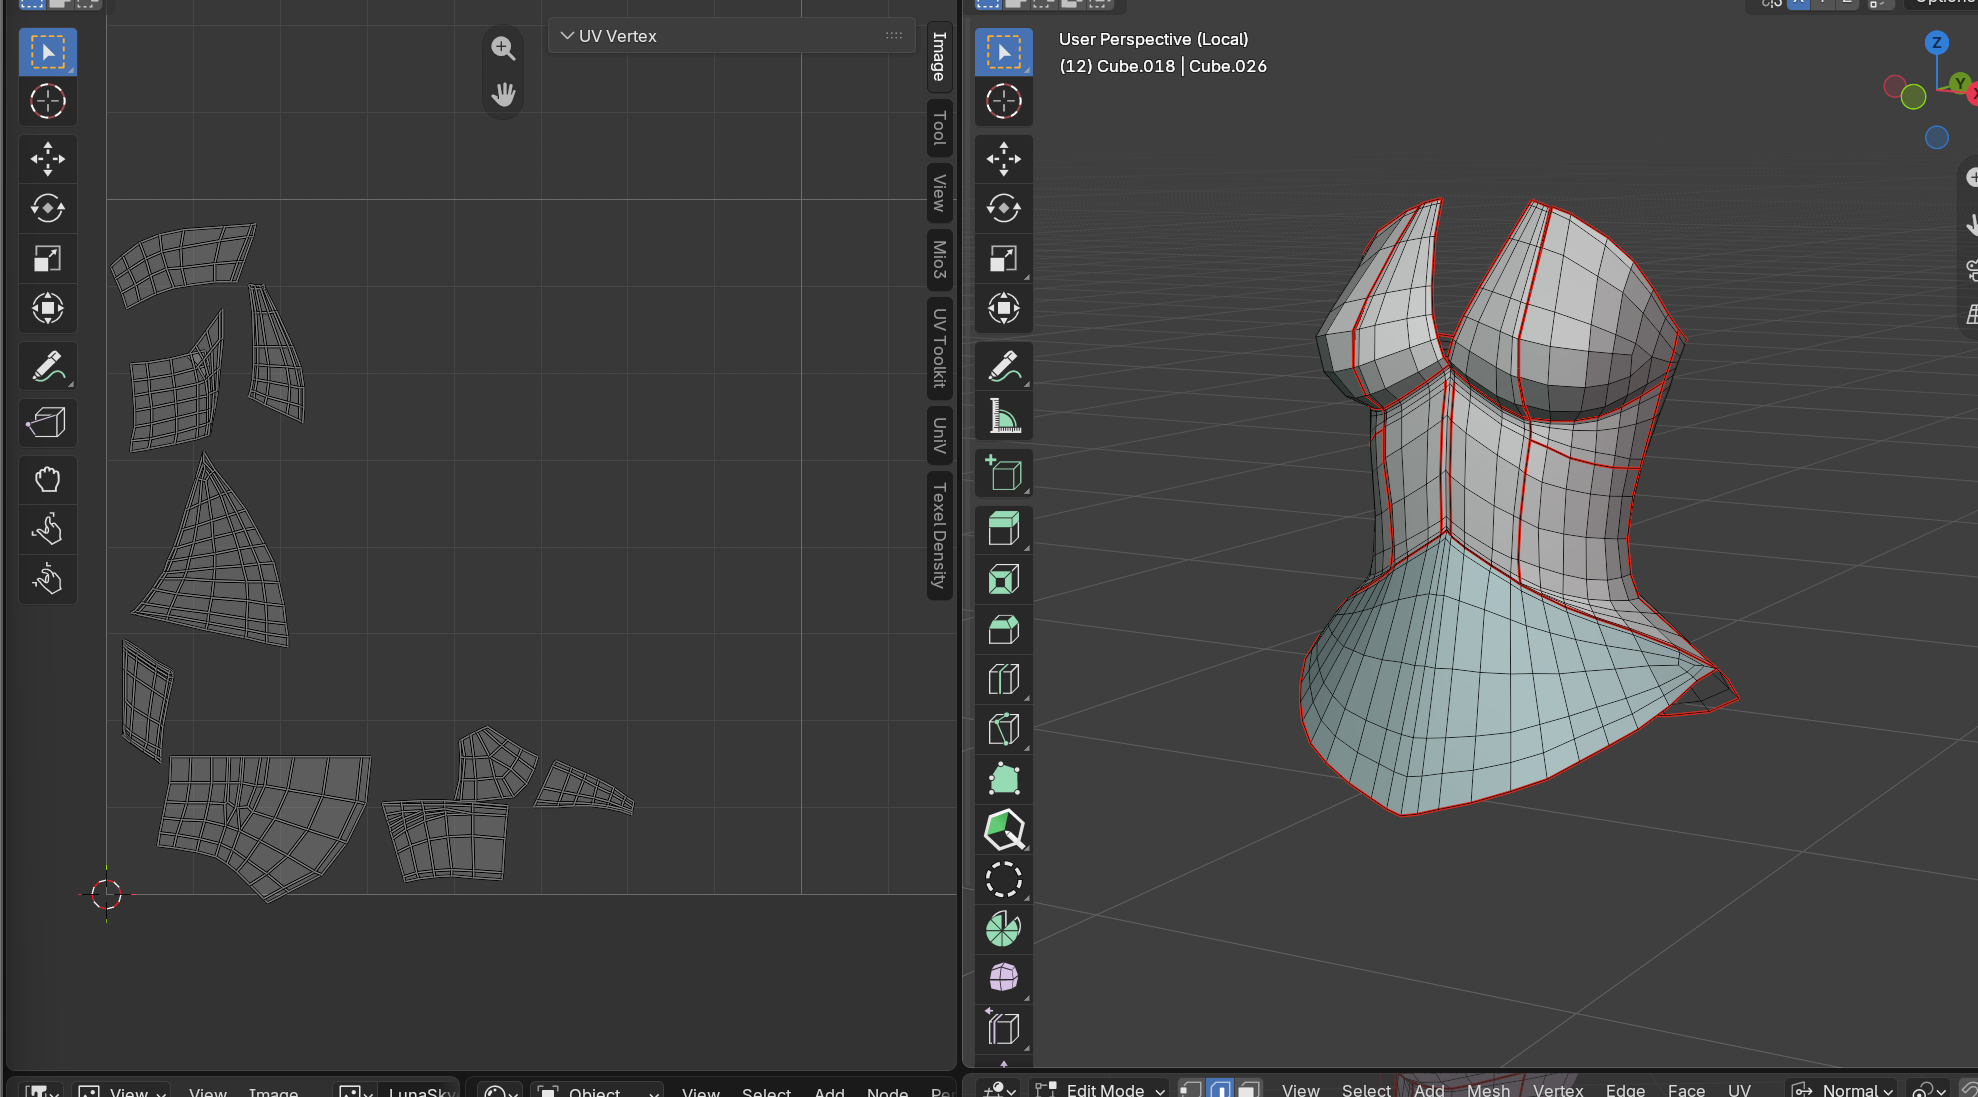
The Geo has been cut into blocks. Each cut will have Line Art.
UVs MUST BE SQUARISHED OUT IN ORDER TO MAKE THIS WORK!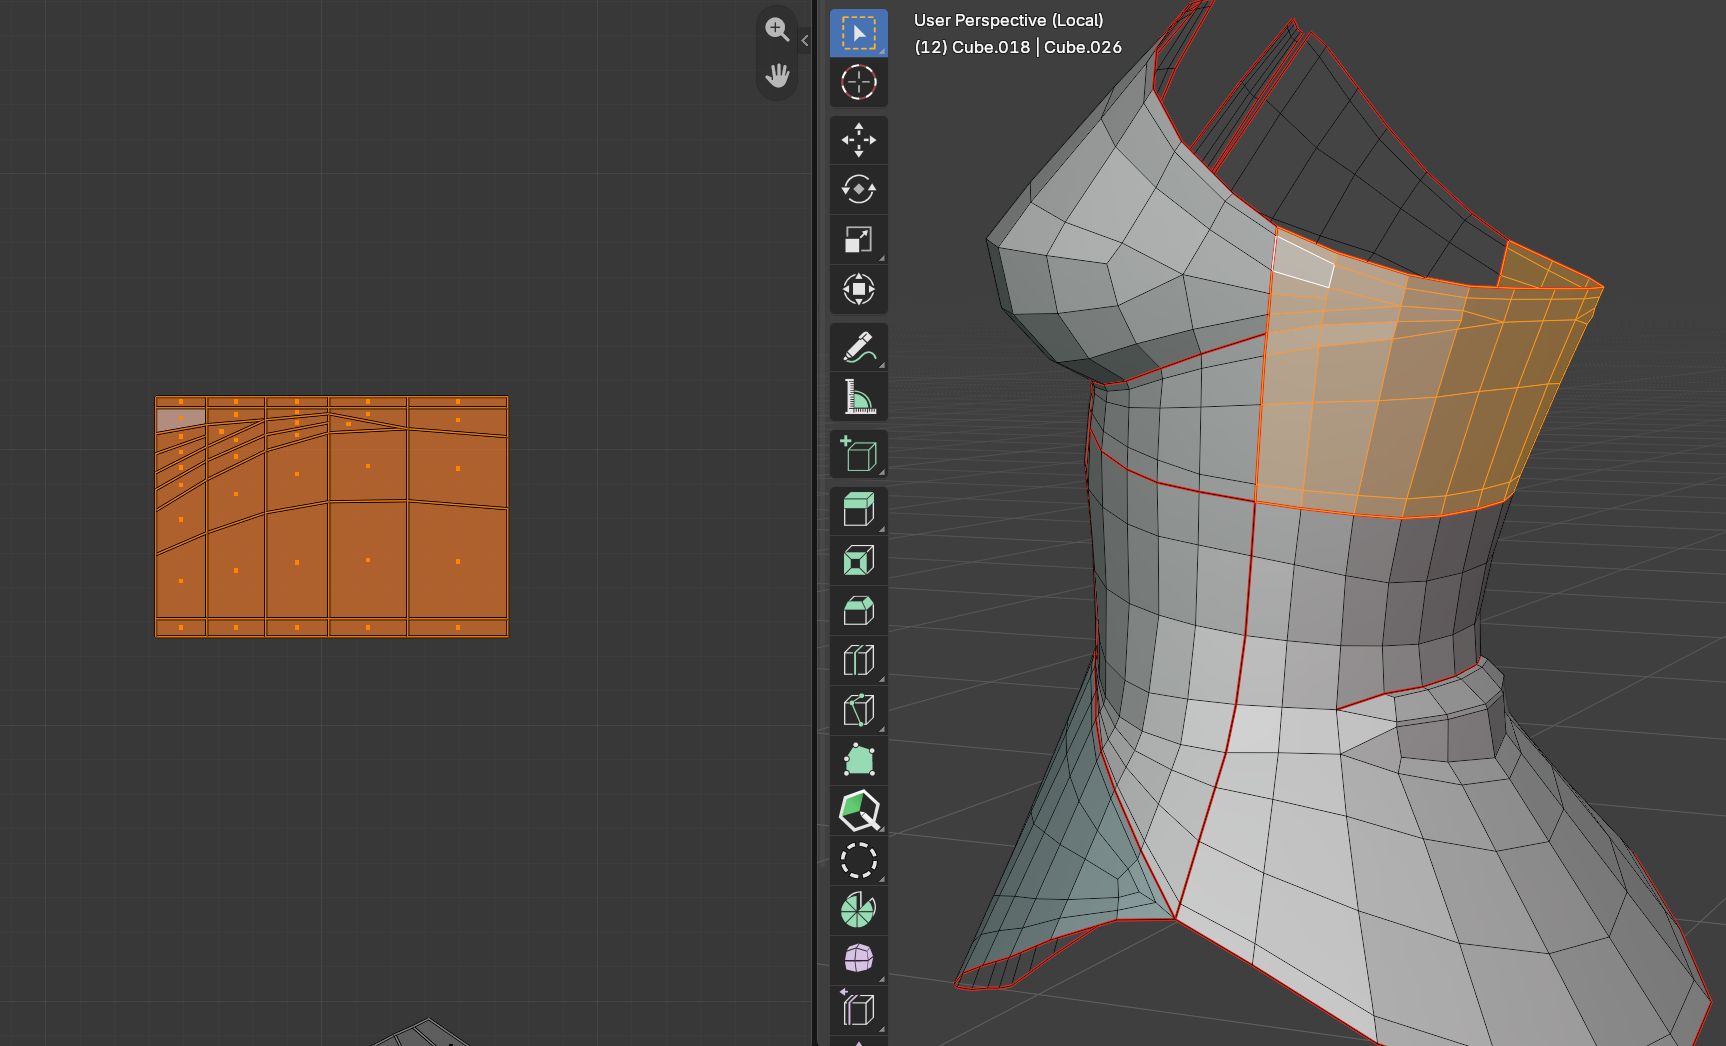
Inner line art is driven by a B&W Texture. The texture can be created with a low resolution (512x512 is good enough).
It will be created with horizontal and vertical lines, NO DIAGONAL LINES!!!
We do this in order to follow pixels' direction which won't cause a quality loss.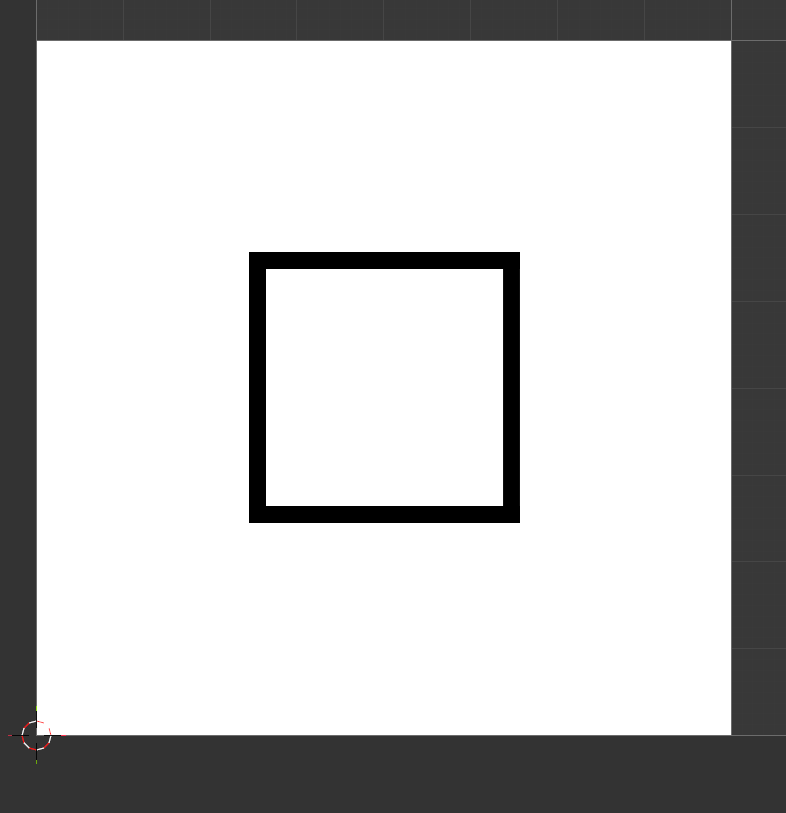
Once we have imported the texture, we start moving the Sets over the black line. 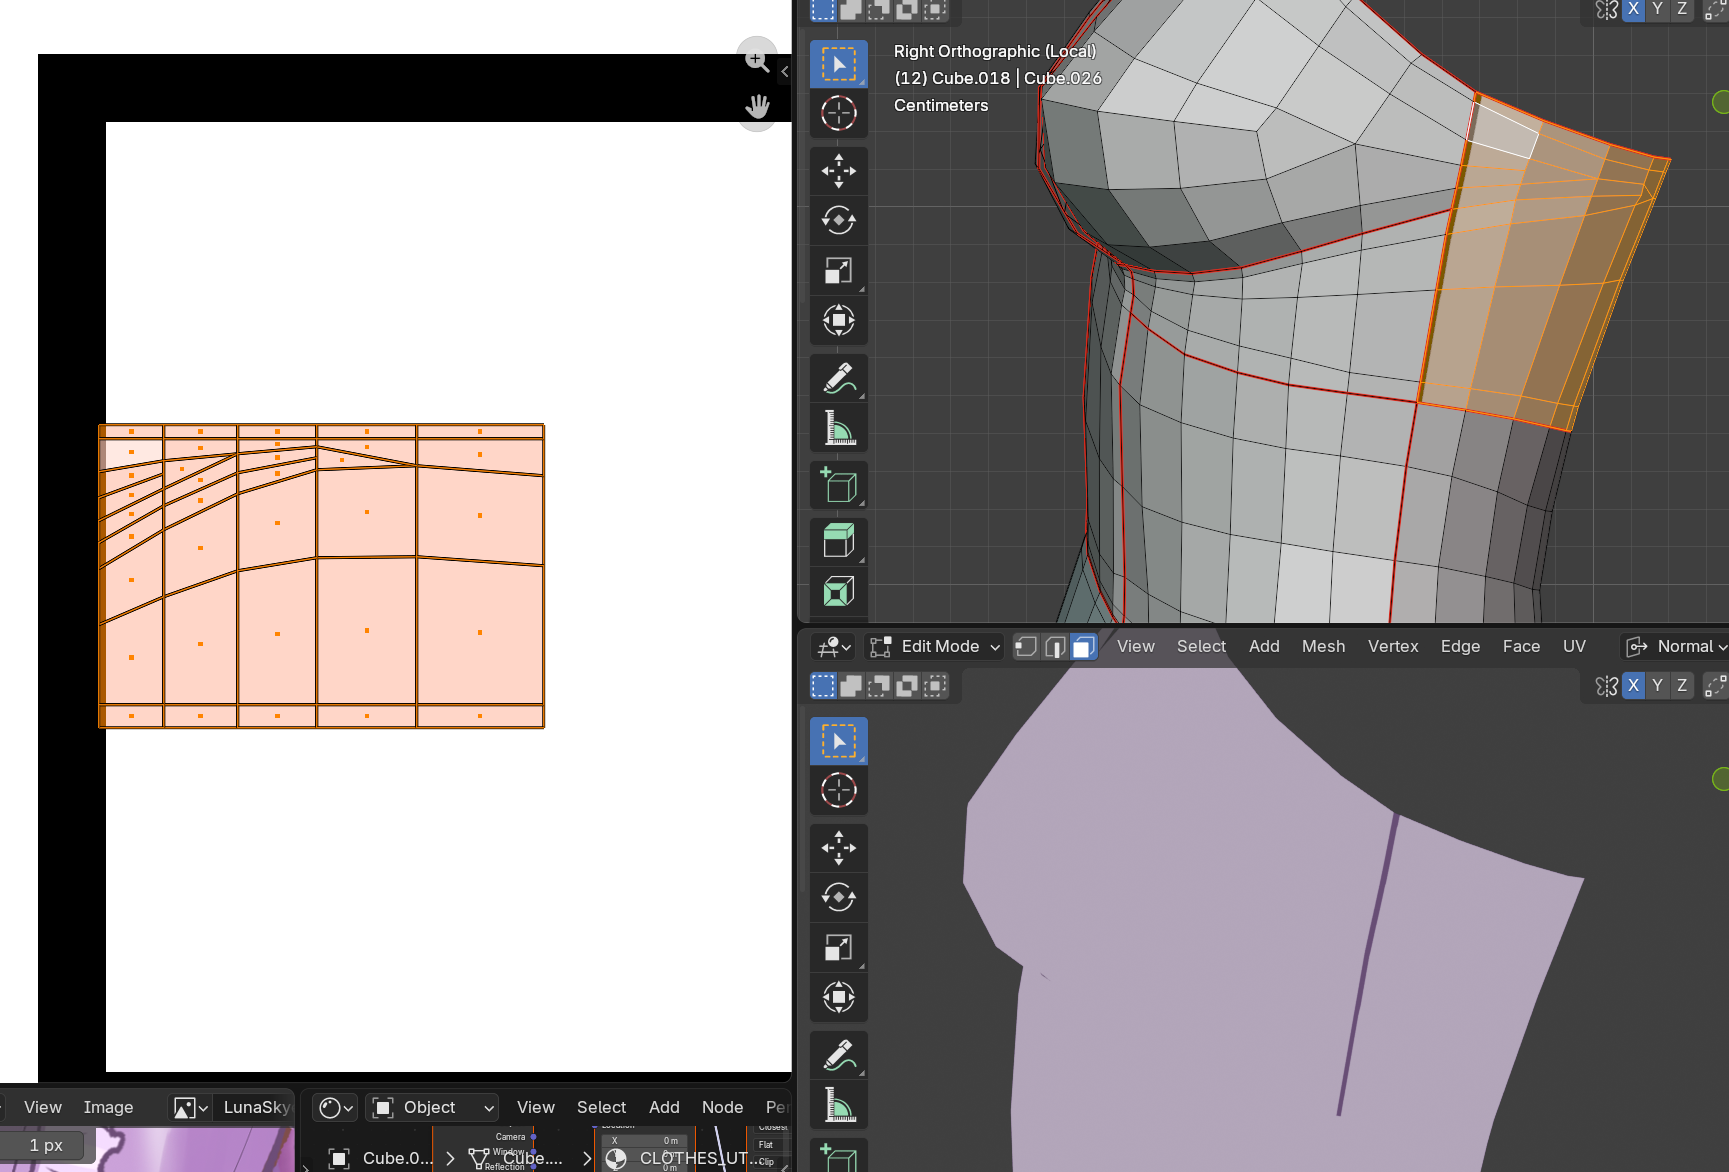
Then we start moving the vertices that touch the line in order to create thickness variation or to make the line disappear.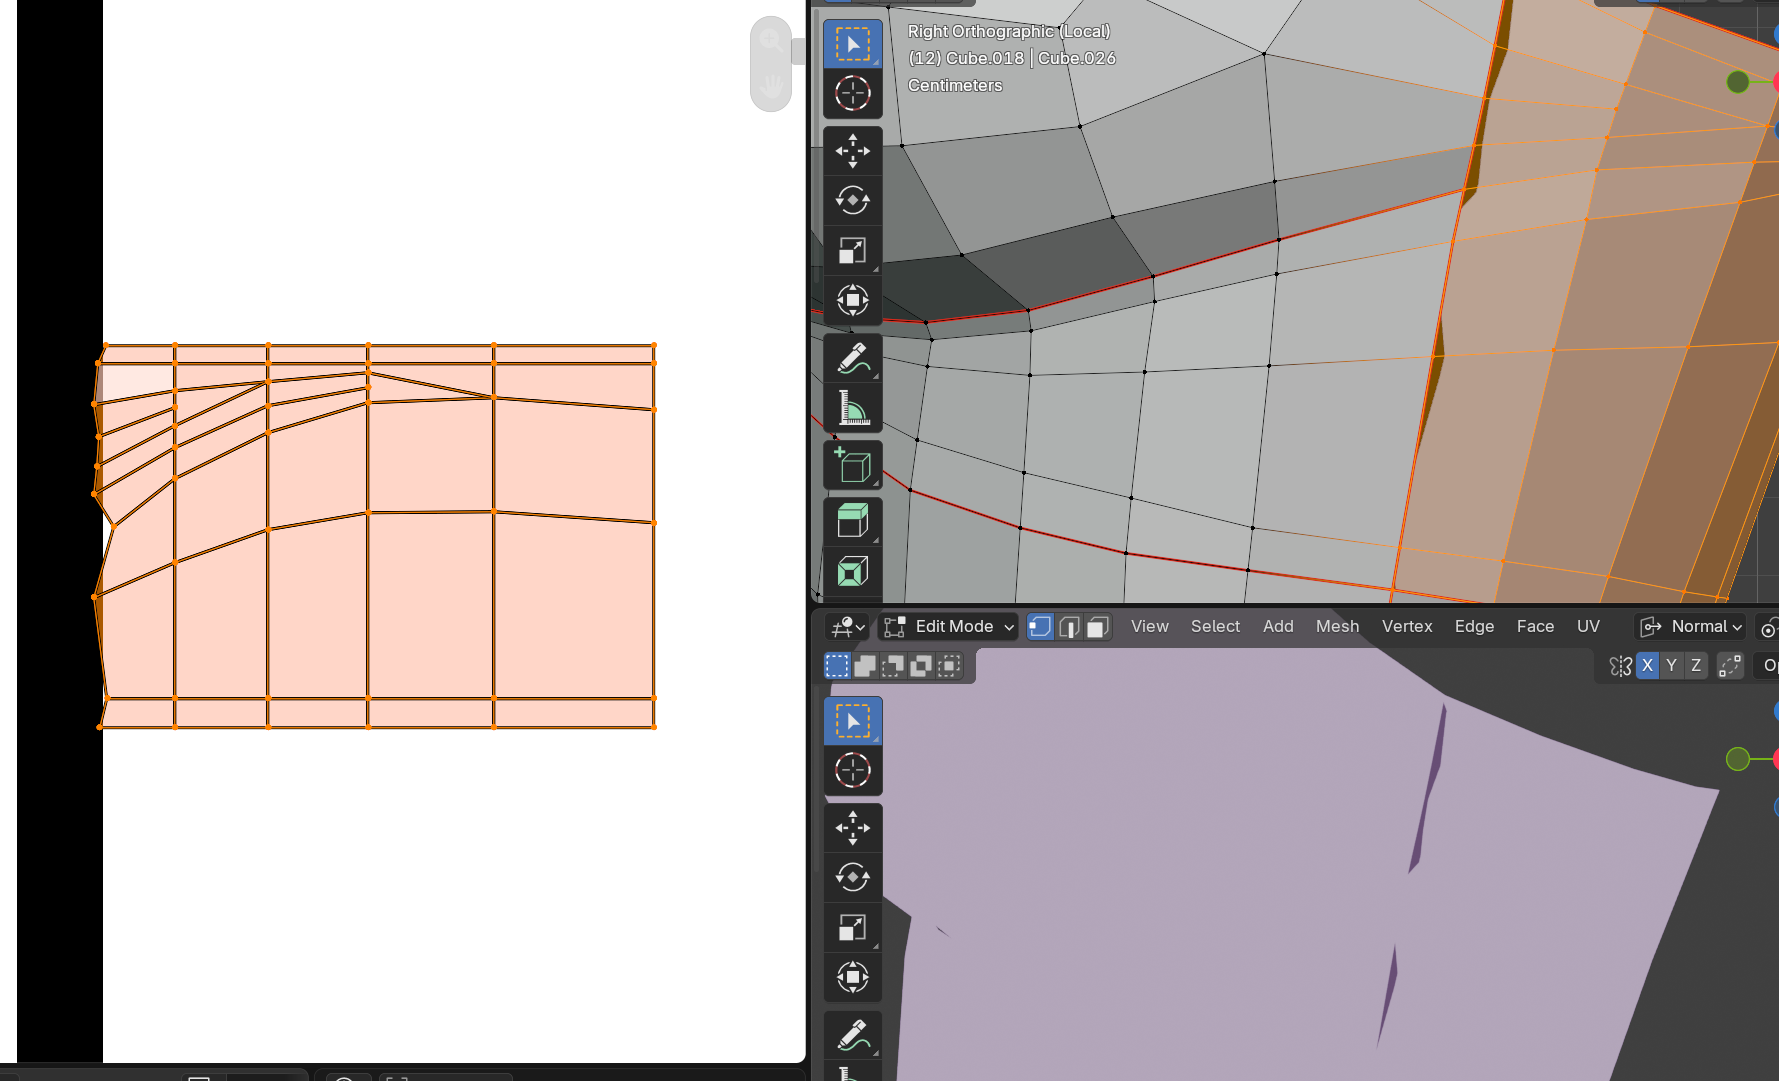
If you close the gap between the vertices that are on the lines and the one next to them the line will appear thicker.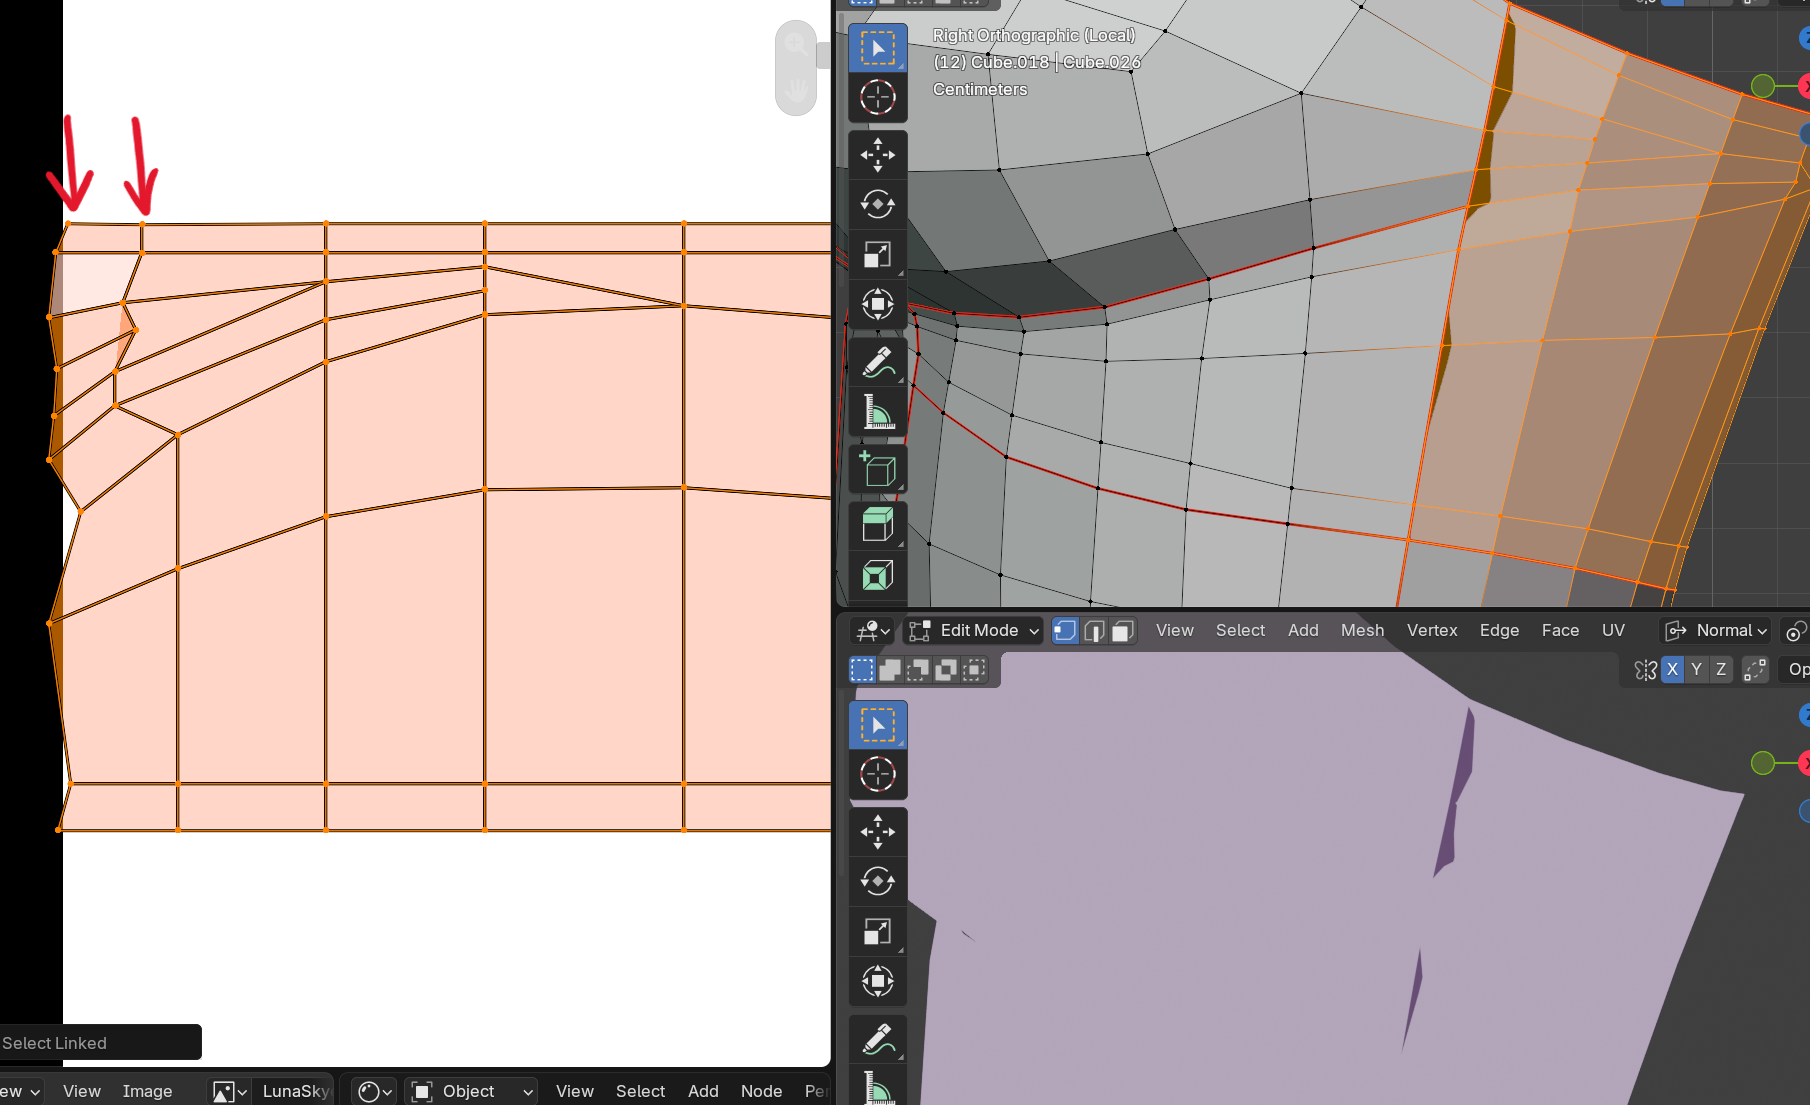
Let's say you have to add another line inside this block, but you haven't cut that edge. How do we resolve this without having to unwrap this block again?
With Face select mode turned on we select the section that needs to be separated, we press (V) and then we move the section.
As you can see the section is now separated from the block it was attached to. If you notice you won't get a red line (marking UV cuts) on the geo.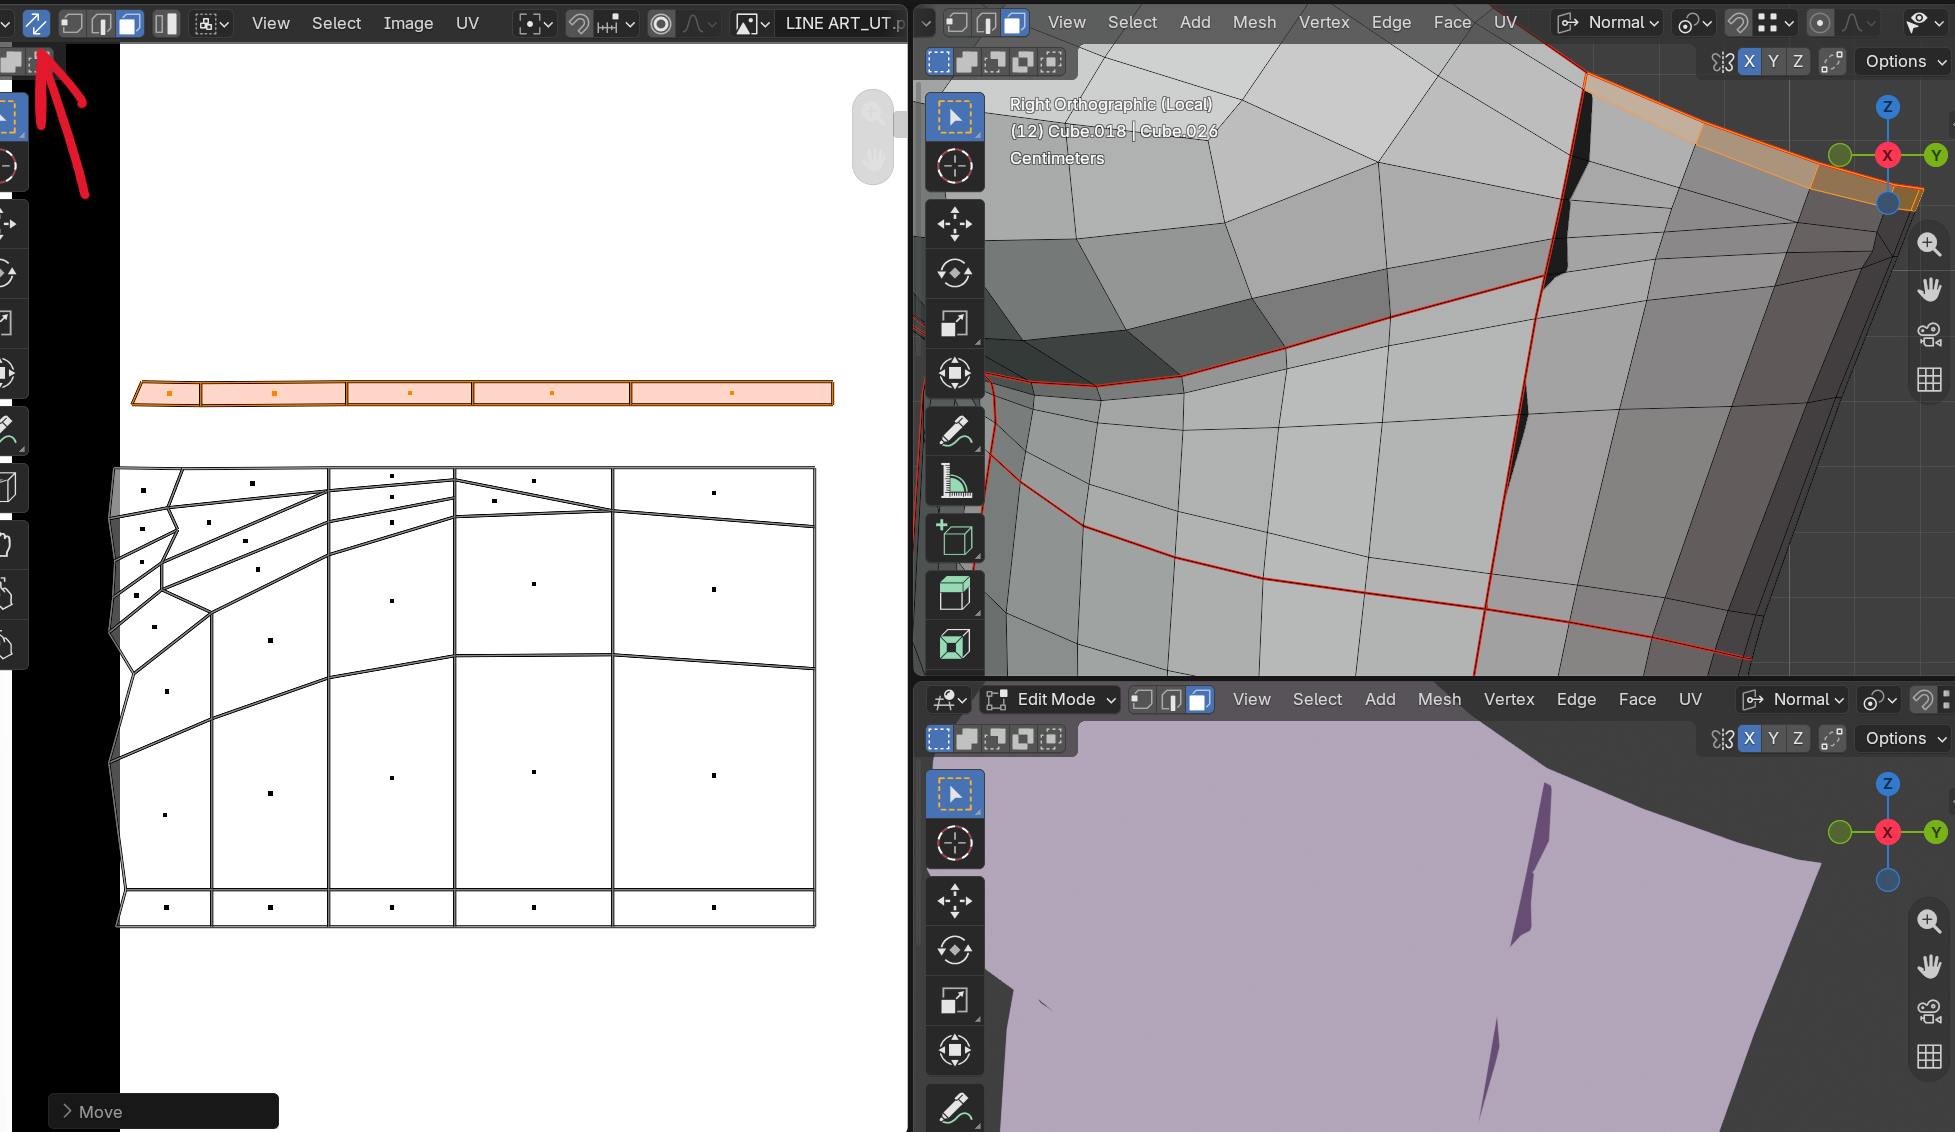
We keep repeating the same process until we have the whole Geo done!

The method is pretty simple and straightforward. If you have any issue hit me up and I'll help you out!
Keep modeling!
Peace.