Animation Guides
Using the rigs, using cloudrig, animation tips and tricks, general blender usage, and best-practices.
The Rig UI
Currently we use CloudRig to build our rigs. CloudRig offers a lot of flexibility in setup, but also forces certain things to behave a certain way. Contact me (Wyatt) if there's something that feels wrong or you would like improved. Depending on what it is, we might be able to adjust it.
CloudRig documentation: studio.blender.org
CloudRig Download: CloudRig — Blender Extensions
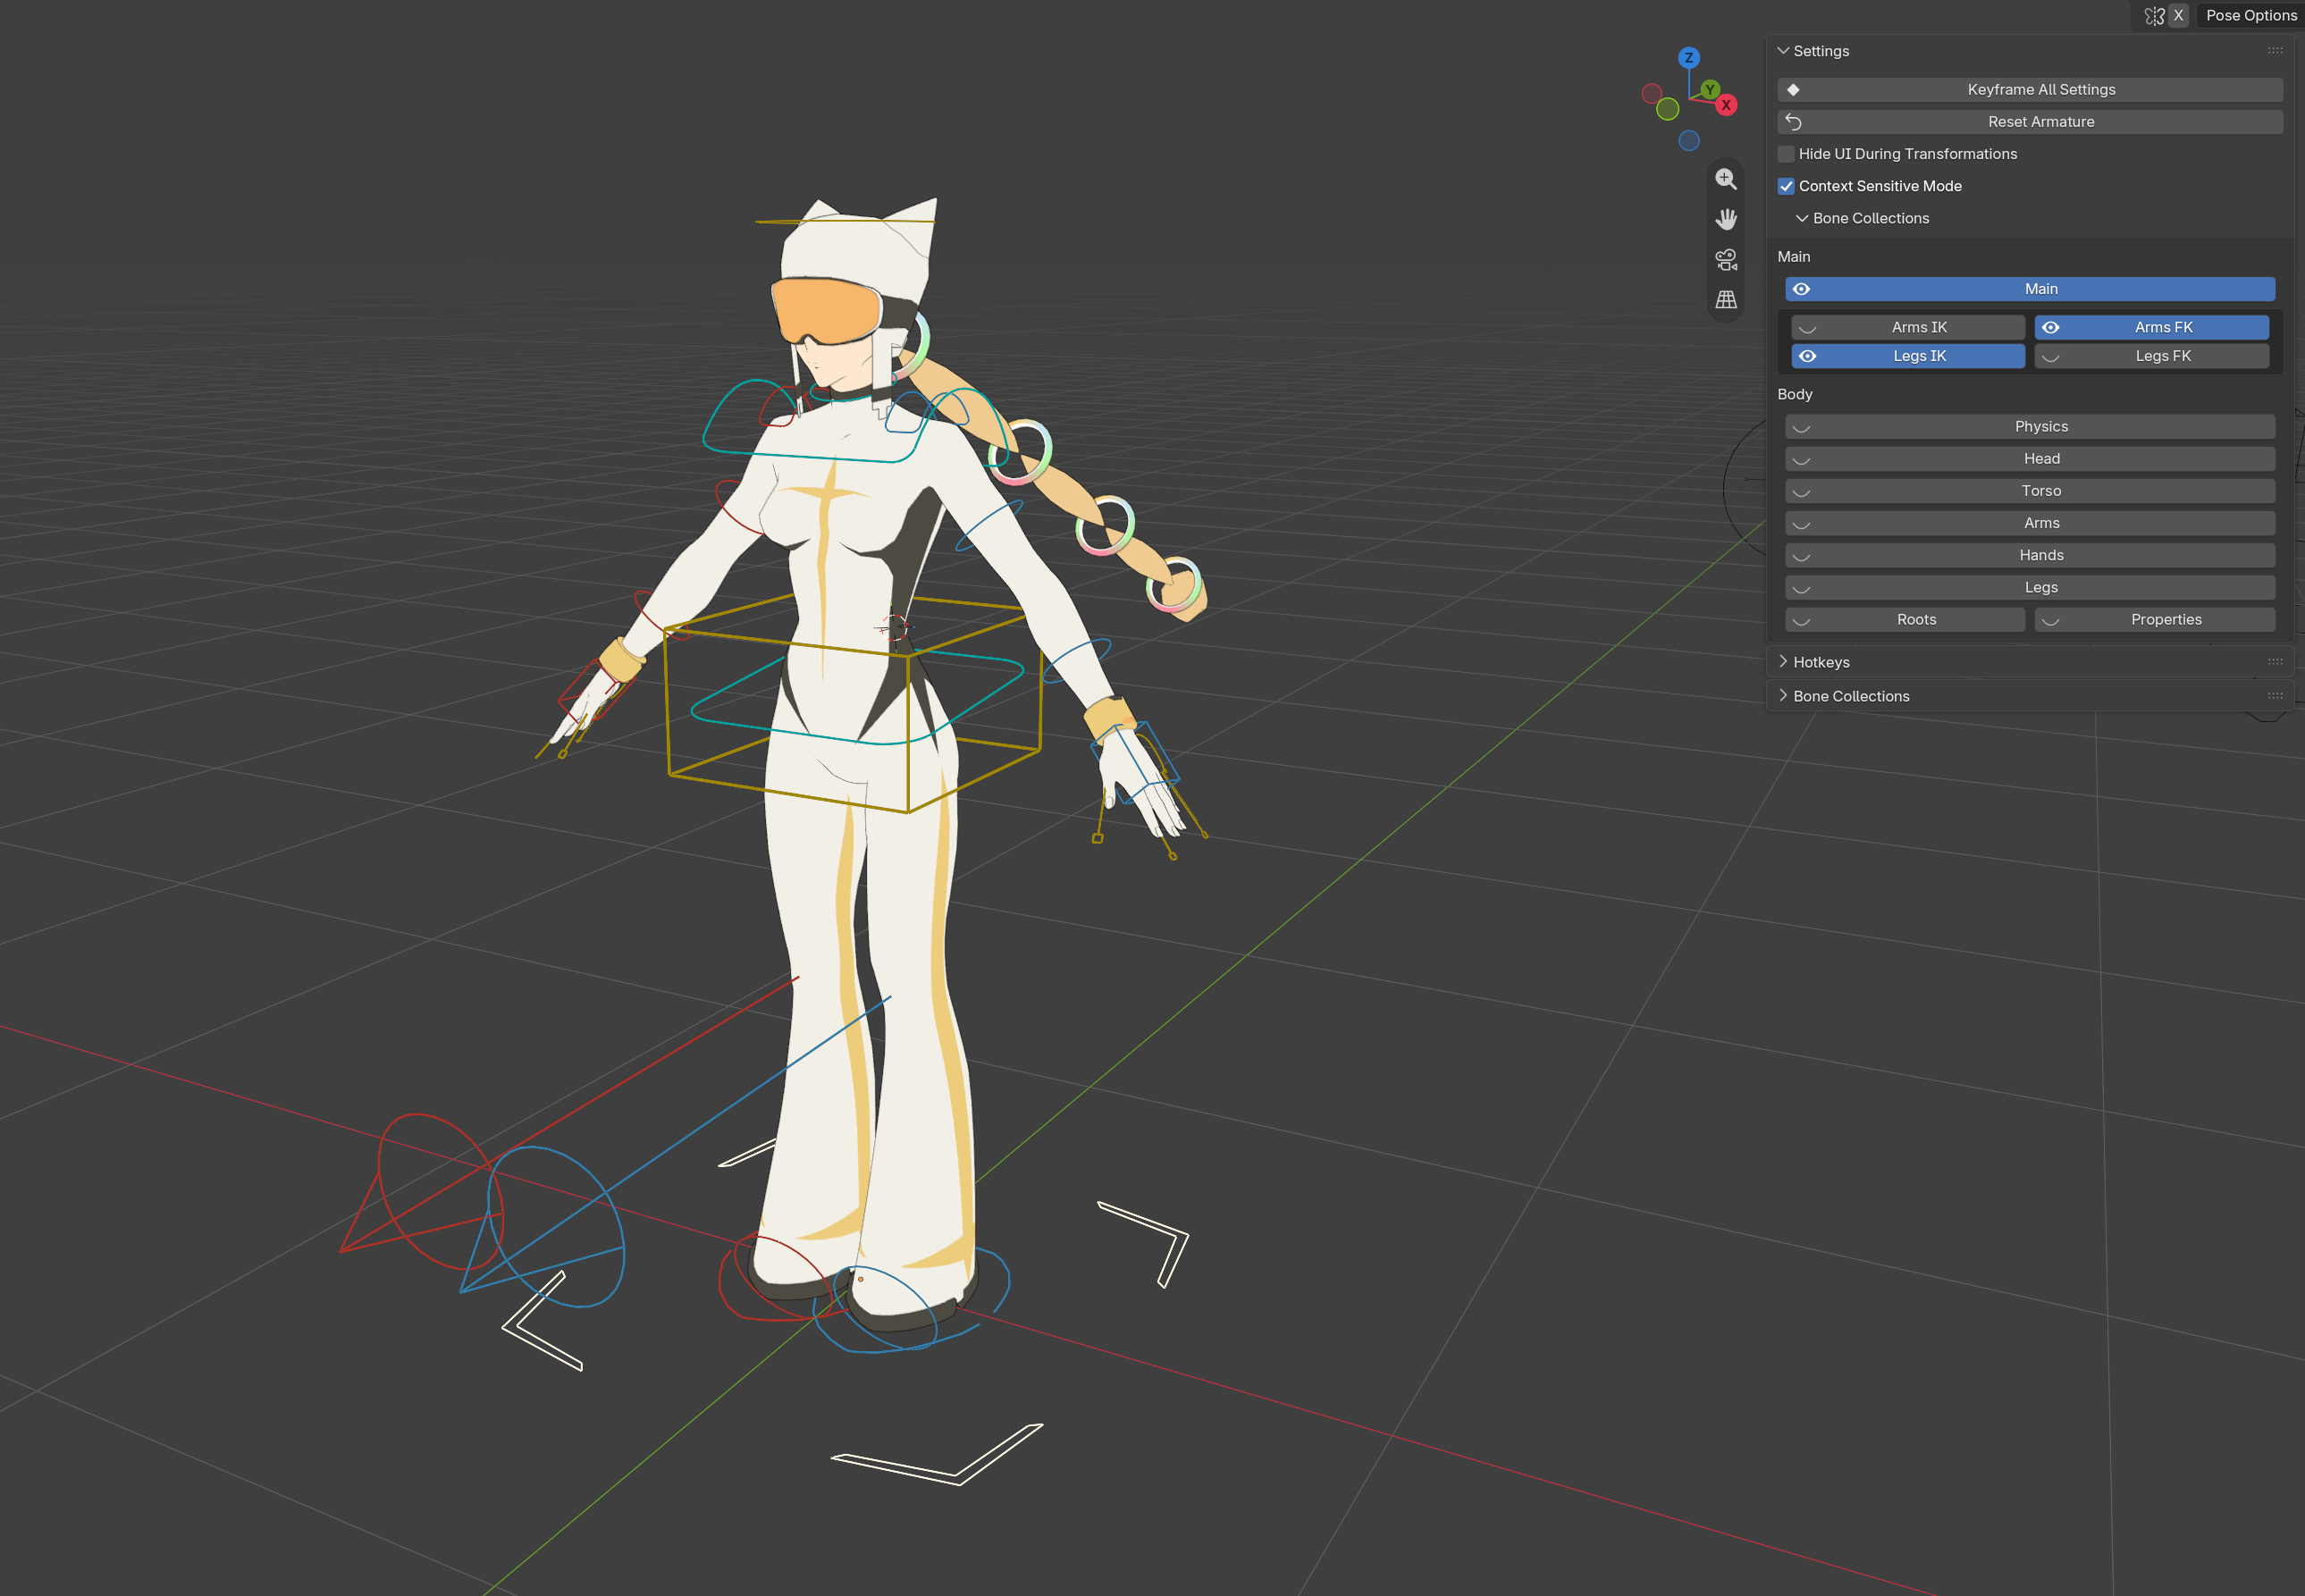
Default Rig View (Main):
The Main bone group for the rig includes the most-used controls for body mechanics. This is a simplified view which should allow you to do 80% of the animation you need to do with a character.
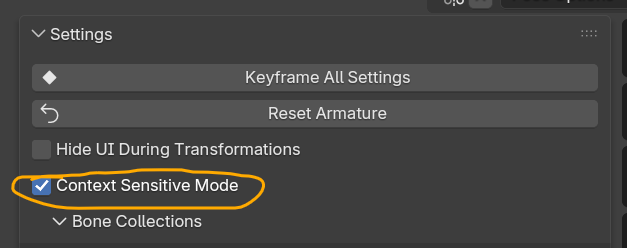
Context Sensitivity:
Cloud rig has an optional toggle for context-sensitive menus. IT IS HIGHLY RECOMMENDED TO TURN THIS ON!!
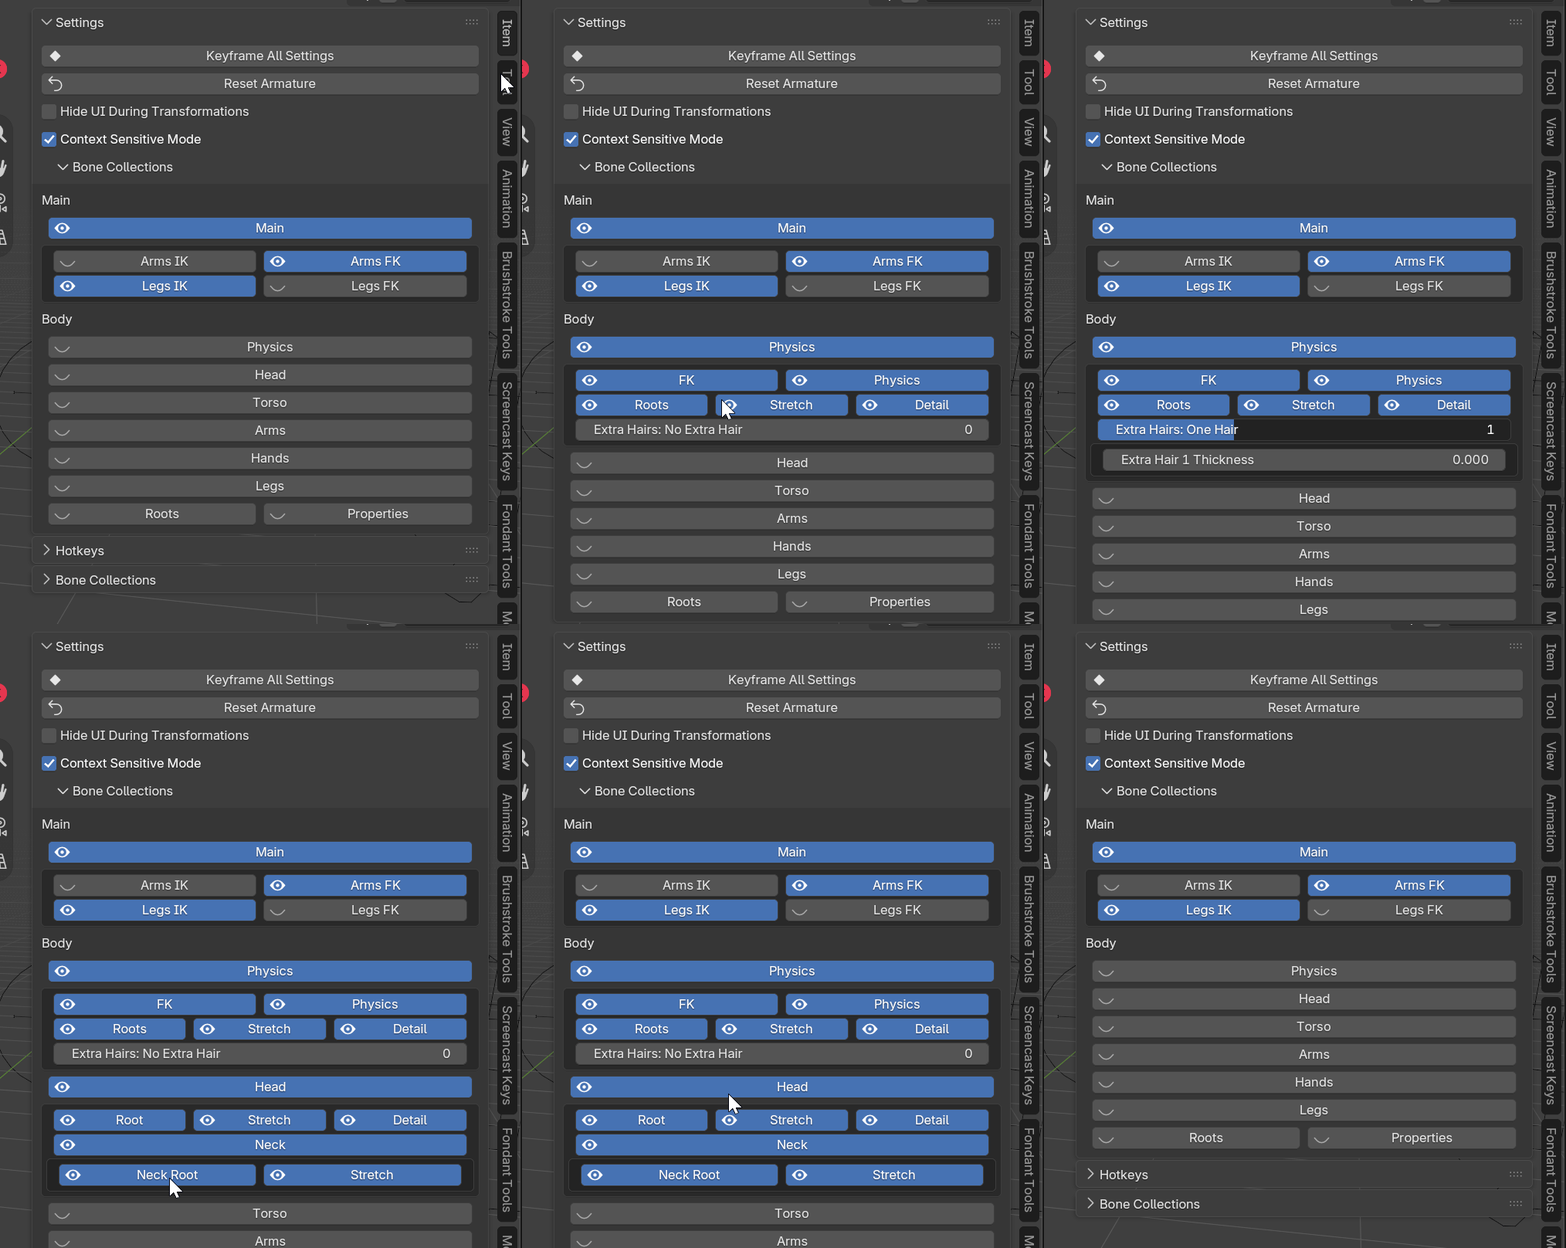
Bone Groups:
Bone Groups can be toggled by clicking them in the CloudRig sidebar.
Bone Groups are hierarchical, meaning that invisible groups will collapse down to save space.
IK/FK Switching:
When you select an IK or FK bone, options for IK/FK switching will appear in the menu.
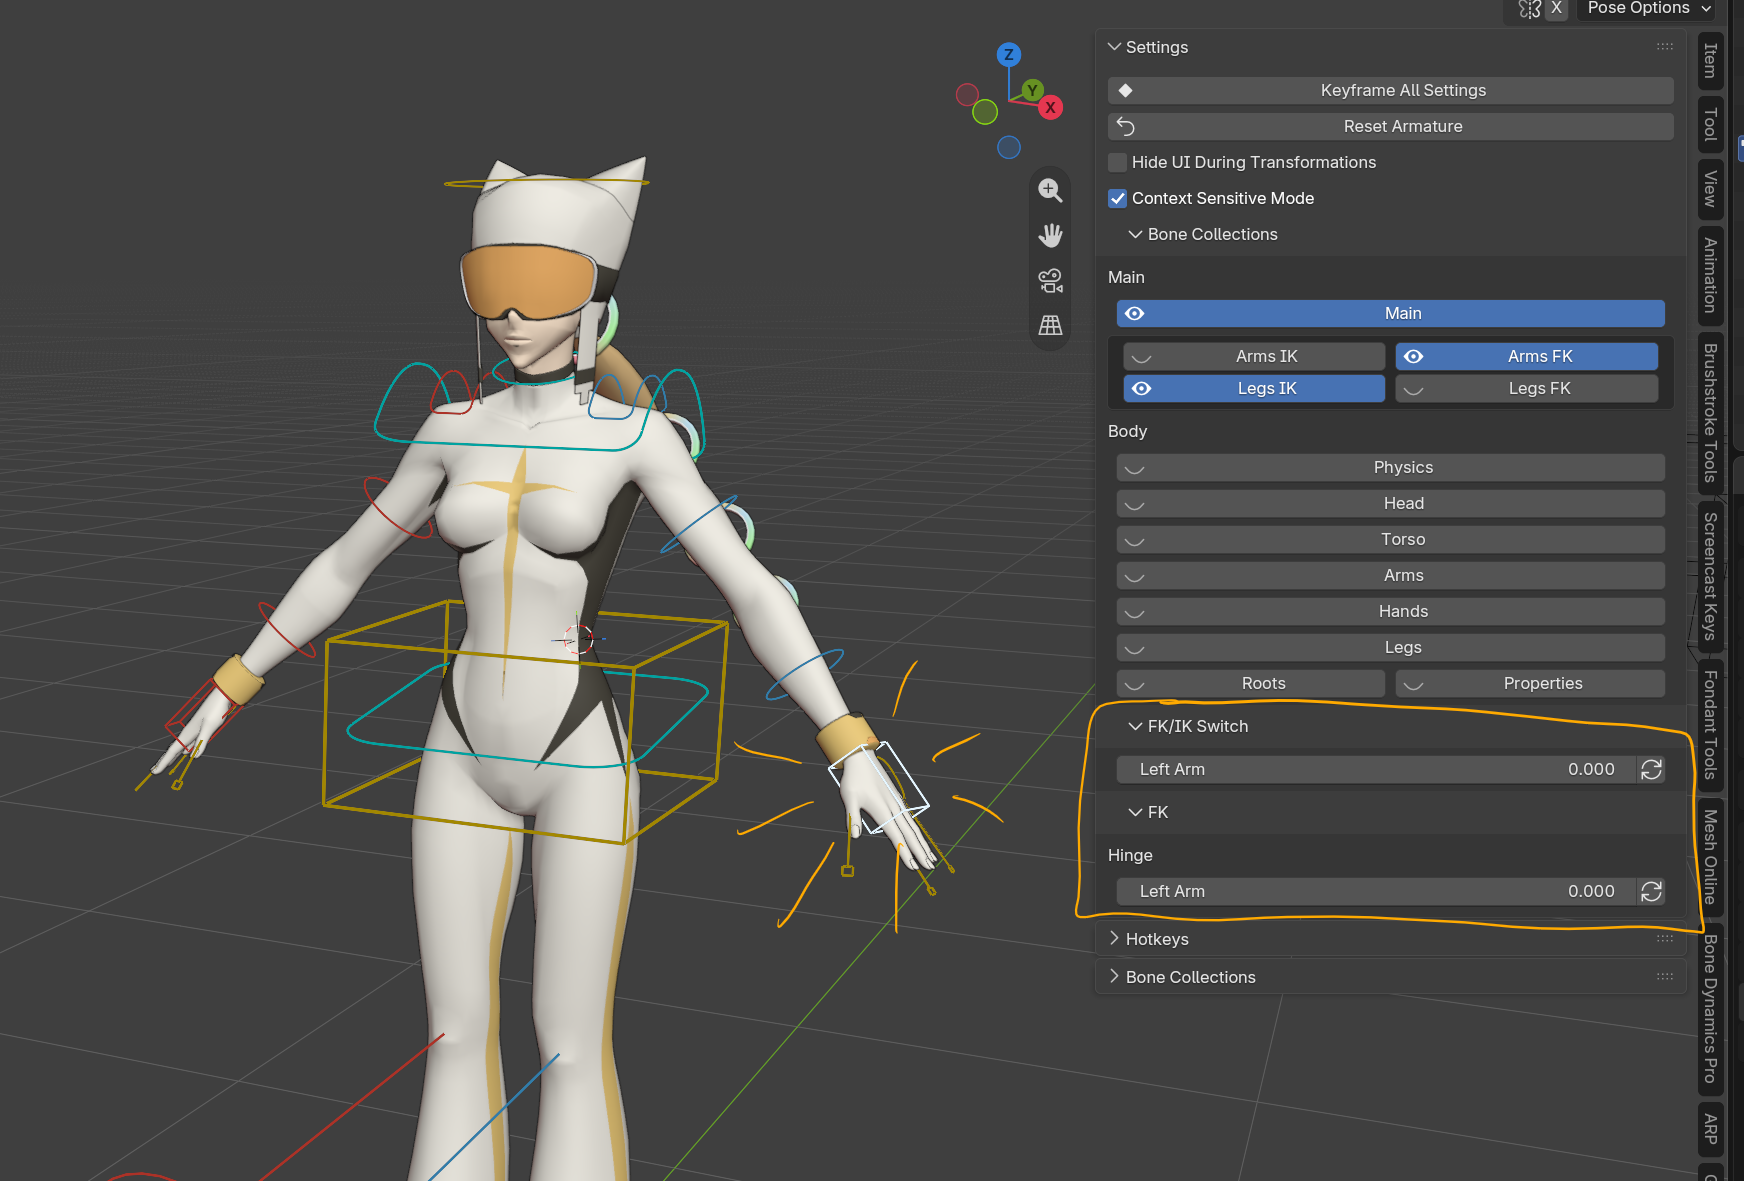
After adjusting the slider, select the IK or FK bone and you may see new options appear. For example, the IK options are below.
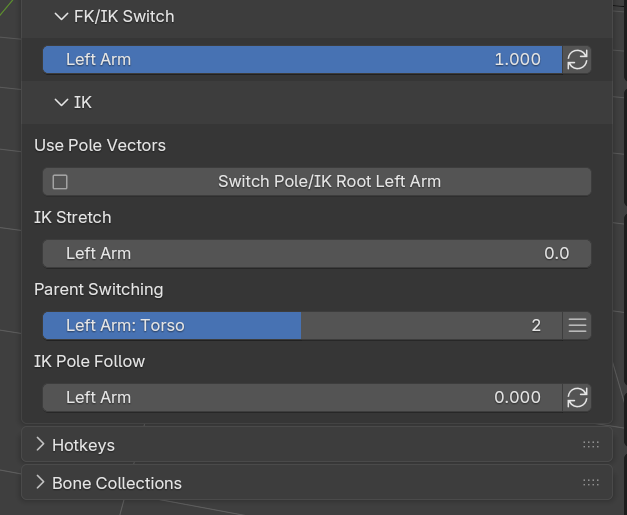
- FK/IK Switch
Switches between IK and FK - Use Pole Vectors
Toggles the IK mode between Pole Vectors and IK Masters. This should be set BEFORE you begin animating. - IK Stretch
Allows the limb to be pulled past its maximum realistic distance - Parent Switching
Slide or press the hamburger menu to change the parent of the selected bone.
Note: To bake animation from IK to FK or vice-versa, press the hamburger menu. - IK Pole Follow
Force the Pole Vector to be parented to the Hand or Foot controller.
Hierarchy of Detail
Most Bone Groups follow a hierarchy of detail. The levels are as follows:
- Master
- macros and bones that otherwise control large areas. The top level bones - Main
- bones you'll interact with 90% of the time - Detail
- bones that affect a very small area, and/or are meant to simulate muscle or help define silhouette - Stretch
- bones that adjust the cartoony stretch of a limb or area - Micro
- bones that affect only a couple vertices
Not every Group will have all of these layers. Some Groups may have special layers.
For example: The Torso Group has a "Pivots" section, which contains multiple extra layers of Torso Roots, as well as a COG offset "Pivot" bone.

Physics
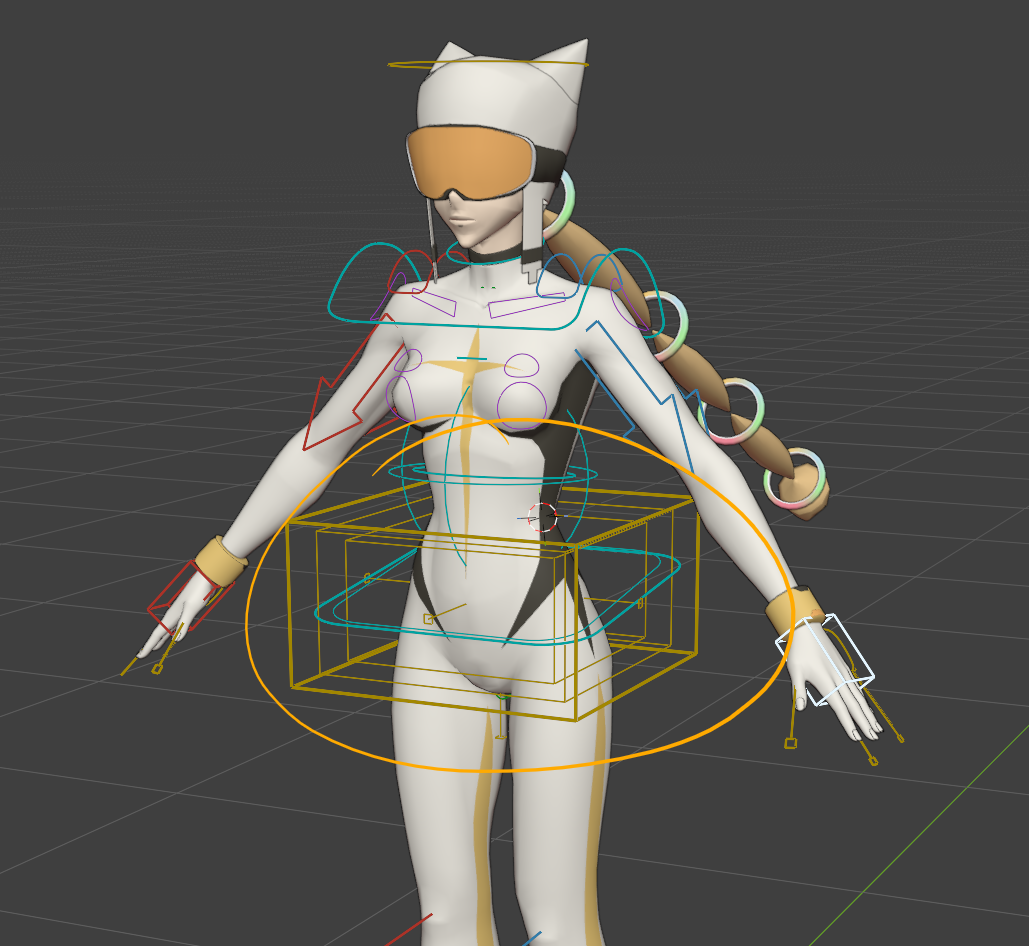
The physics chains are mean to be used with an addon such as GooPhysics or Bone Dynamics.
The purple "PSX" bones are meant to be simulated. After simulation, use the blue FK bones to adjust and fix collisions/look. You can also use the green Stretch bones as additional tweaks.
Animating Props
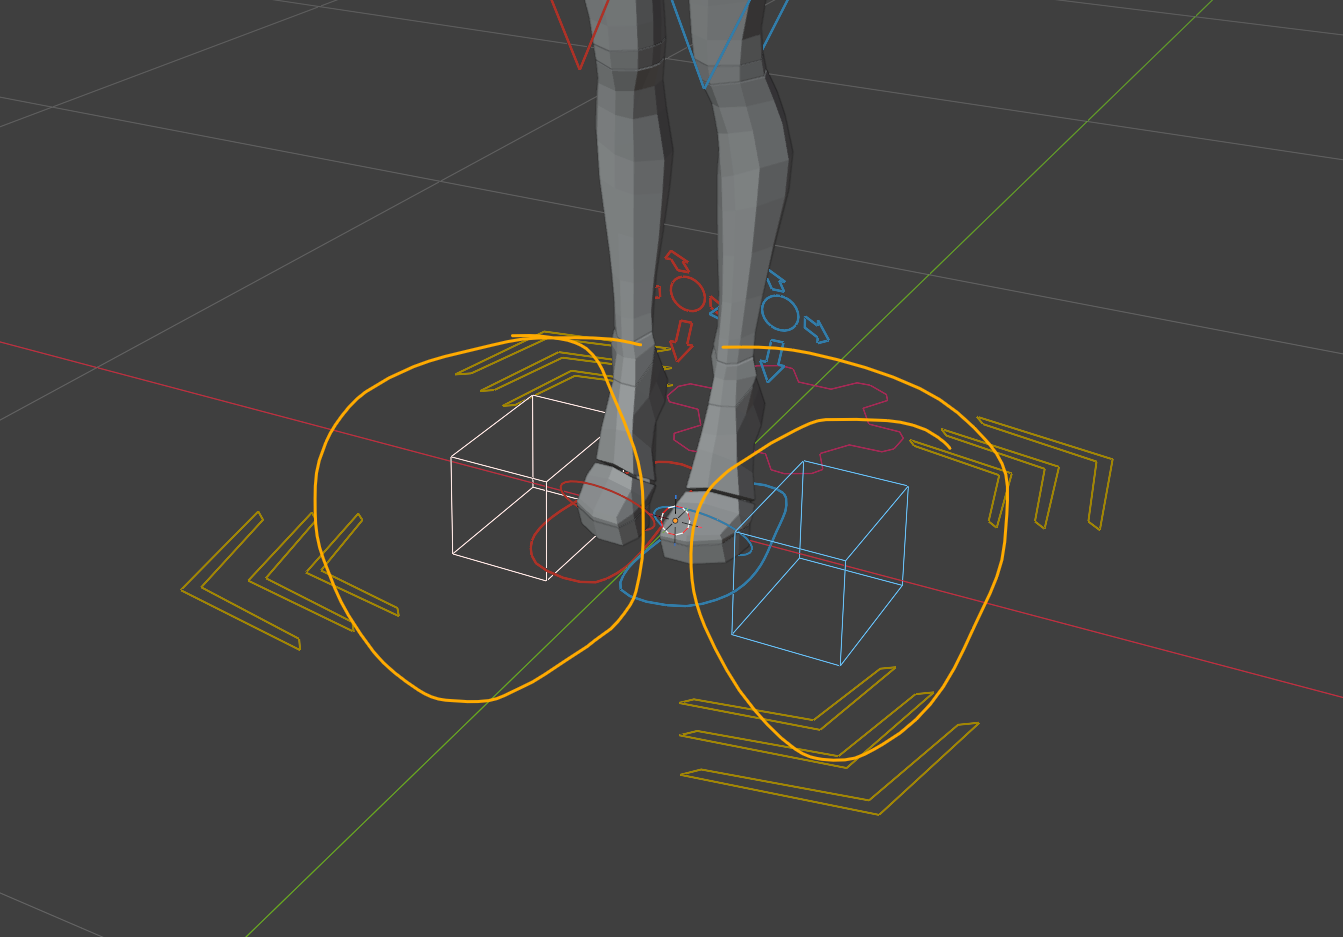
These are prop bones:
These two boxy bones at the base of the rig are Prop bones. They have a parent-switching property on them to make it easy to pick up and hold objects.
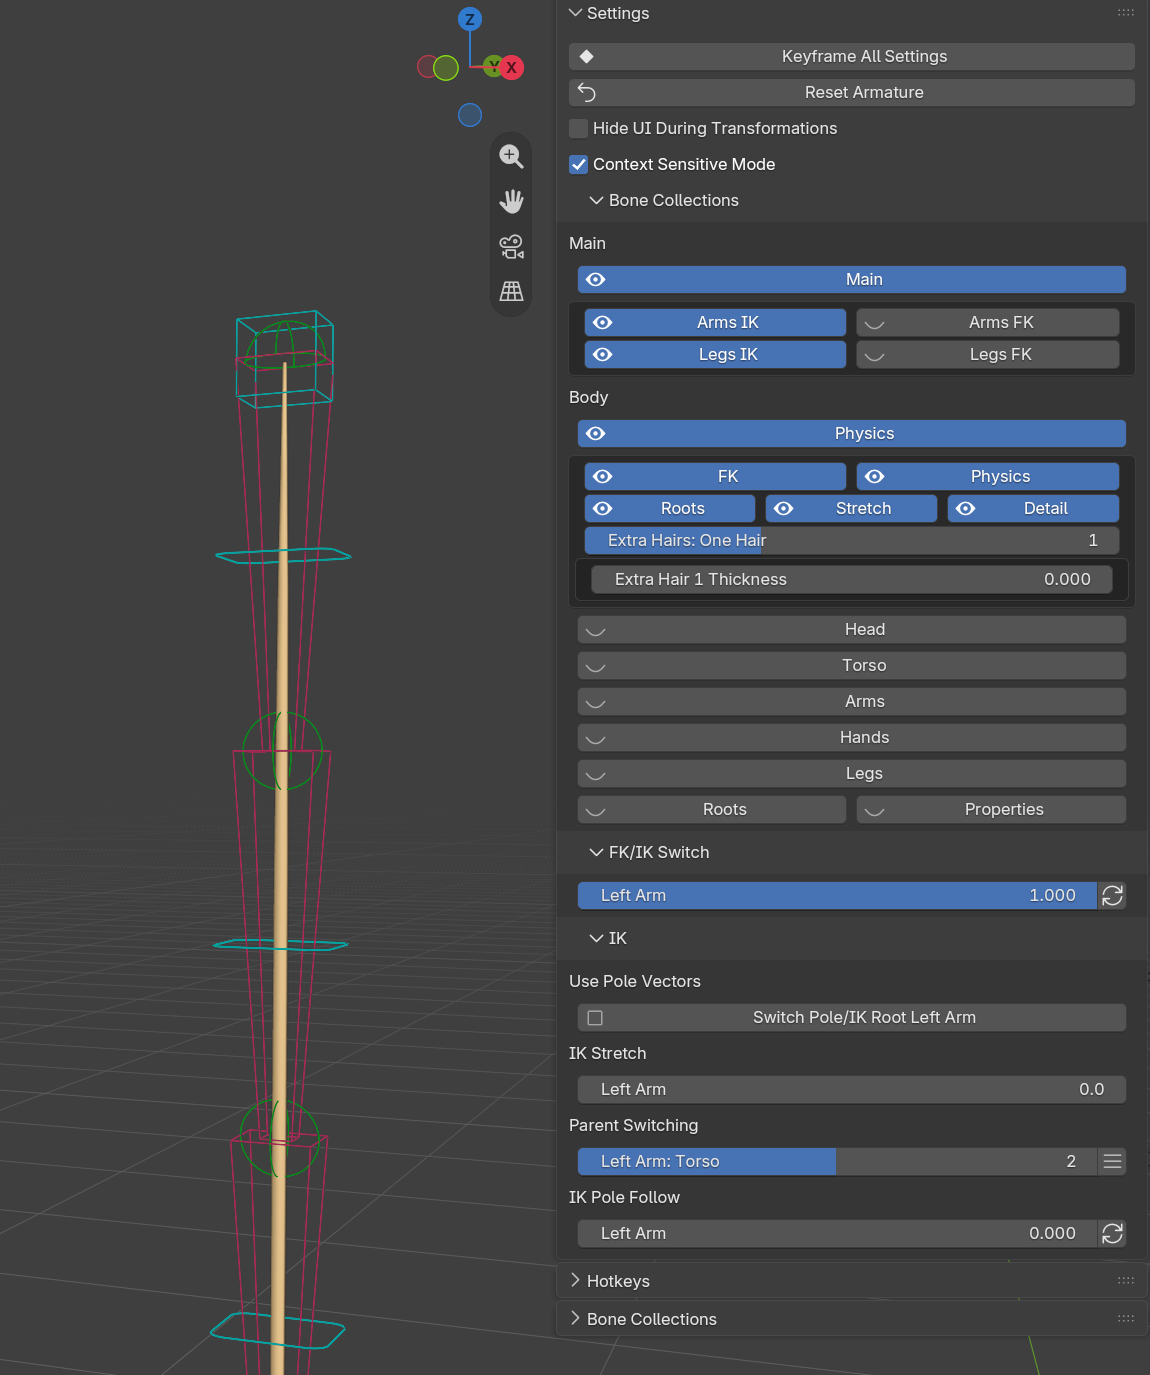
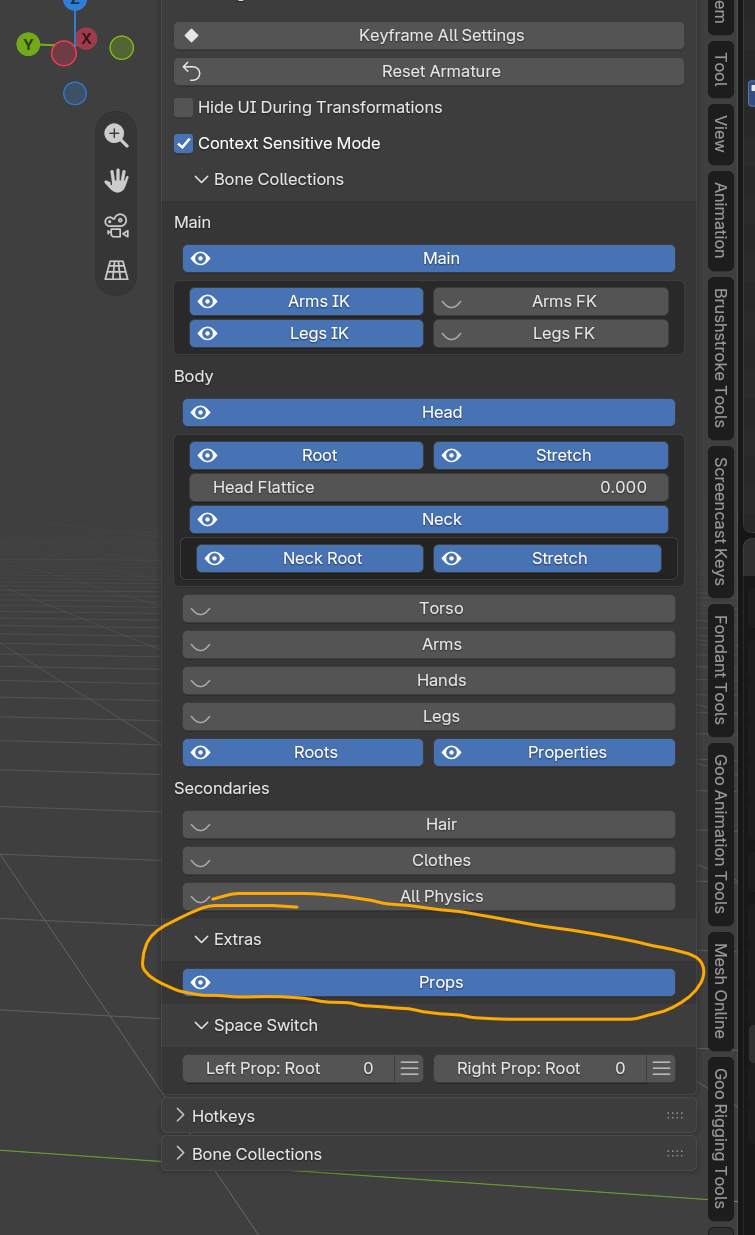
The bones can be revealed in the UI by turning on the Props visibility toggle under Extras:
How to pick something up:
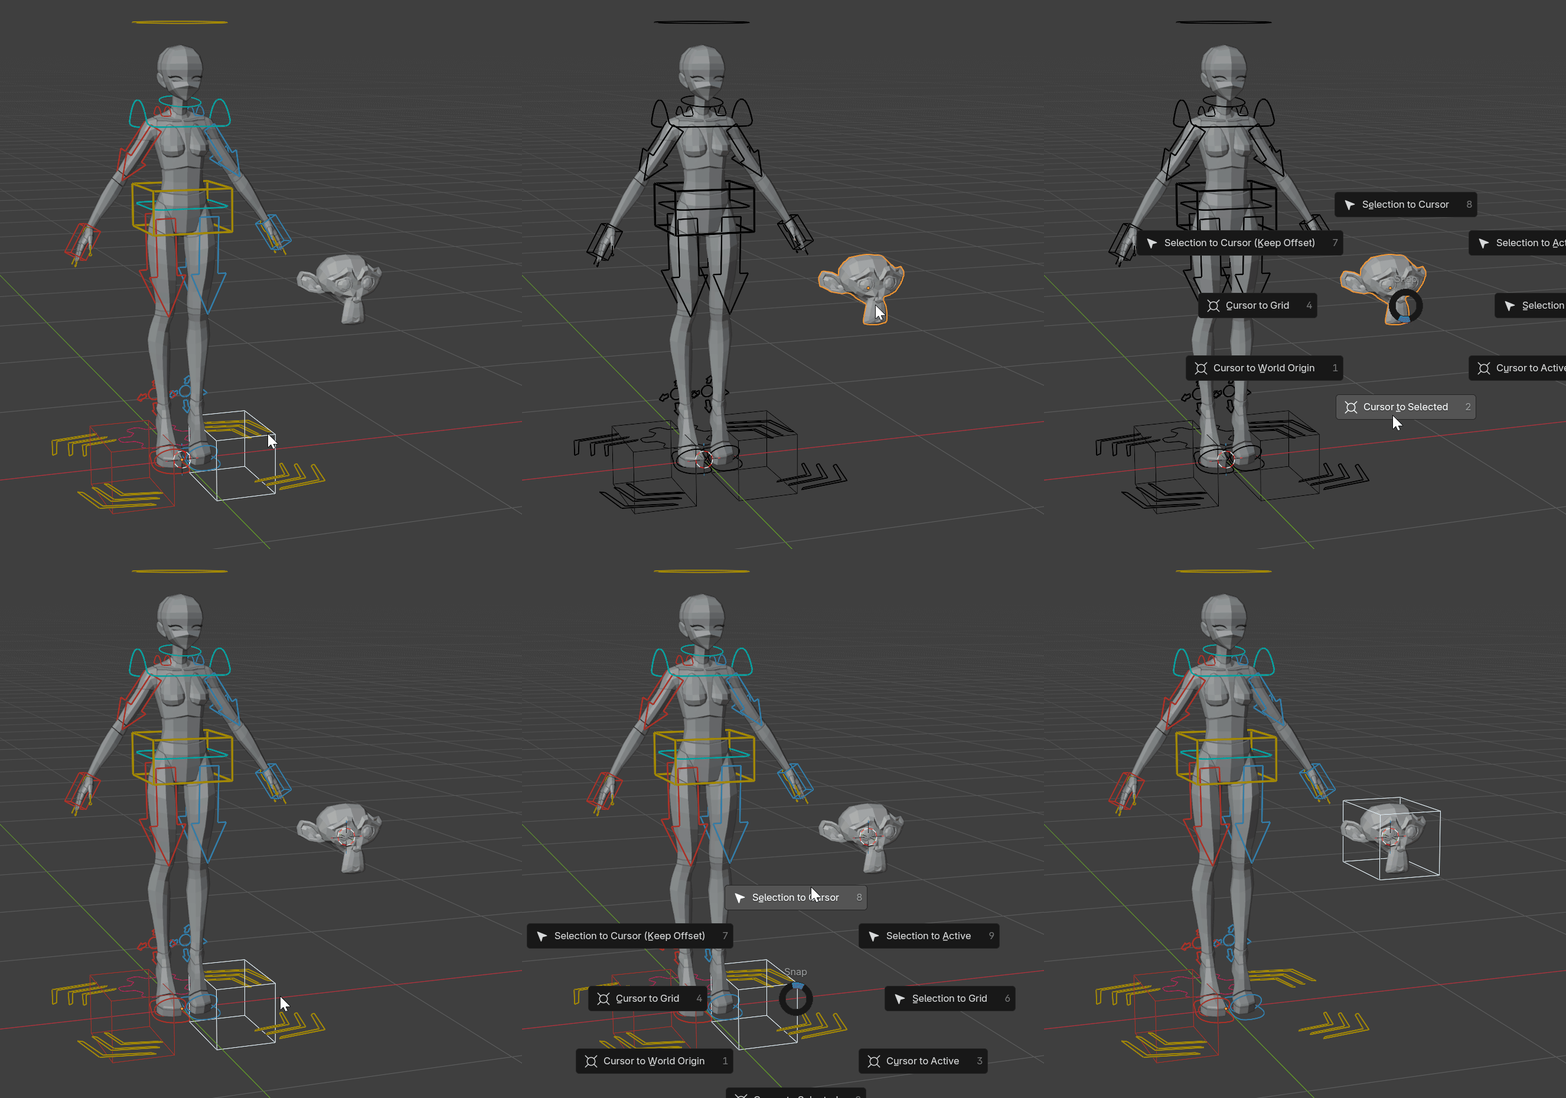
Align the Prop bone with a prop that you want to control.
In this example, I snap the 3D cursor to the Suzanne's origin, and then snap the prop bone to the cursor. You can access this pie menu by holding Shift+S. Alternative search (F3) "snap" or "cursor".
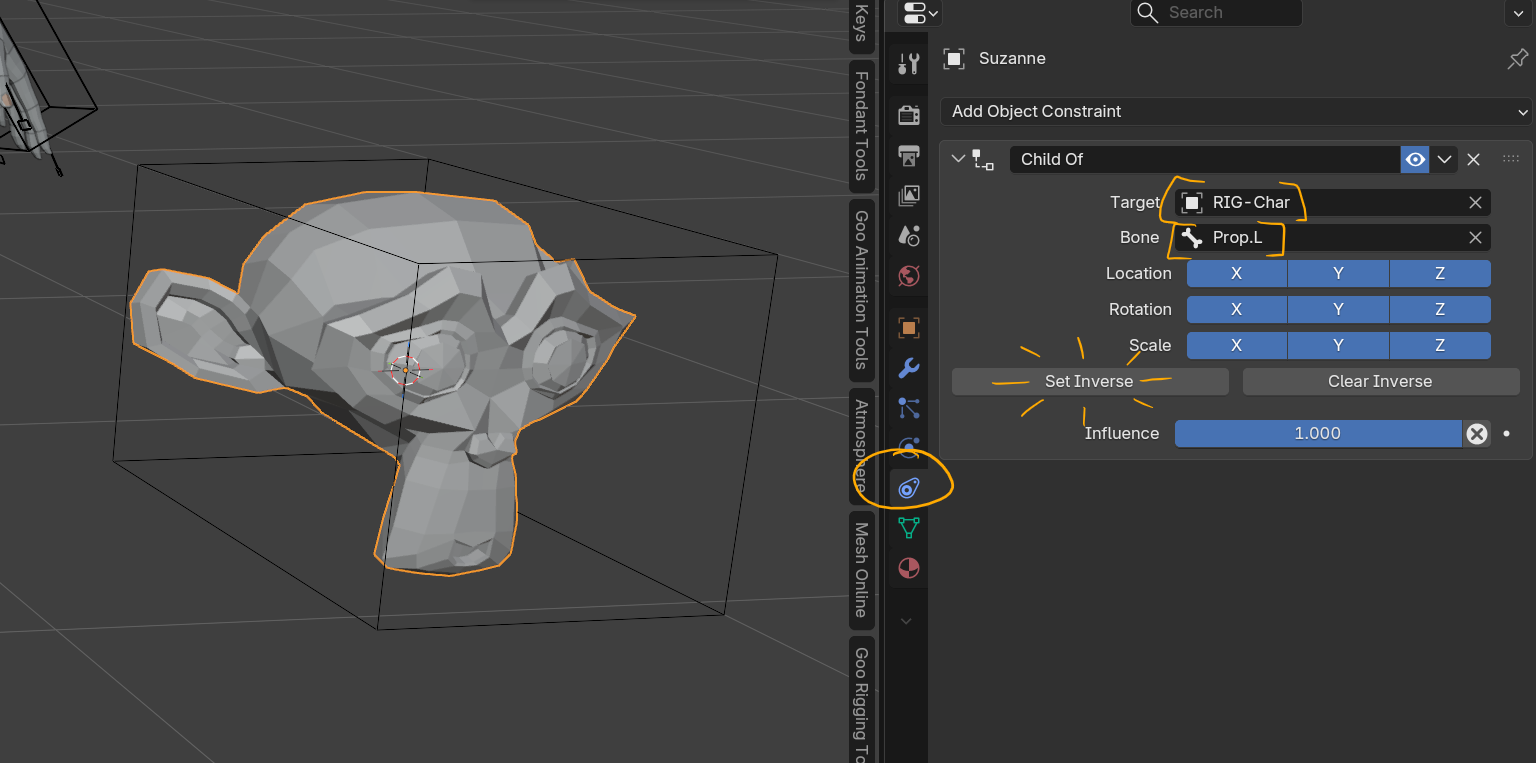
Next, with the prop object selected, add a "Child Of" constraint targeting the Prop bone you want.
Press "Set Inverse" if the transforms get skewed.
Now the prop object will go wherever the Prop bone goes. It will also follow it through Parent Switching.
Adding this Child Of constraint should be done BEFORE you animate. The parent switching system in the character rig itself is meant to handle all of the parent switching necessary for a shot.
You can still do whatever you want of course, but this is the best-practice.
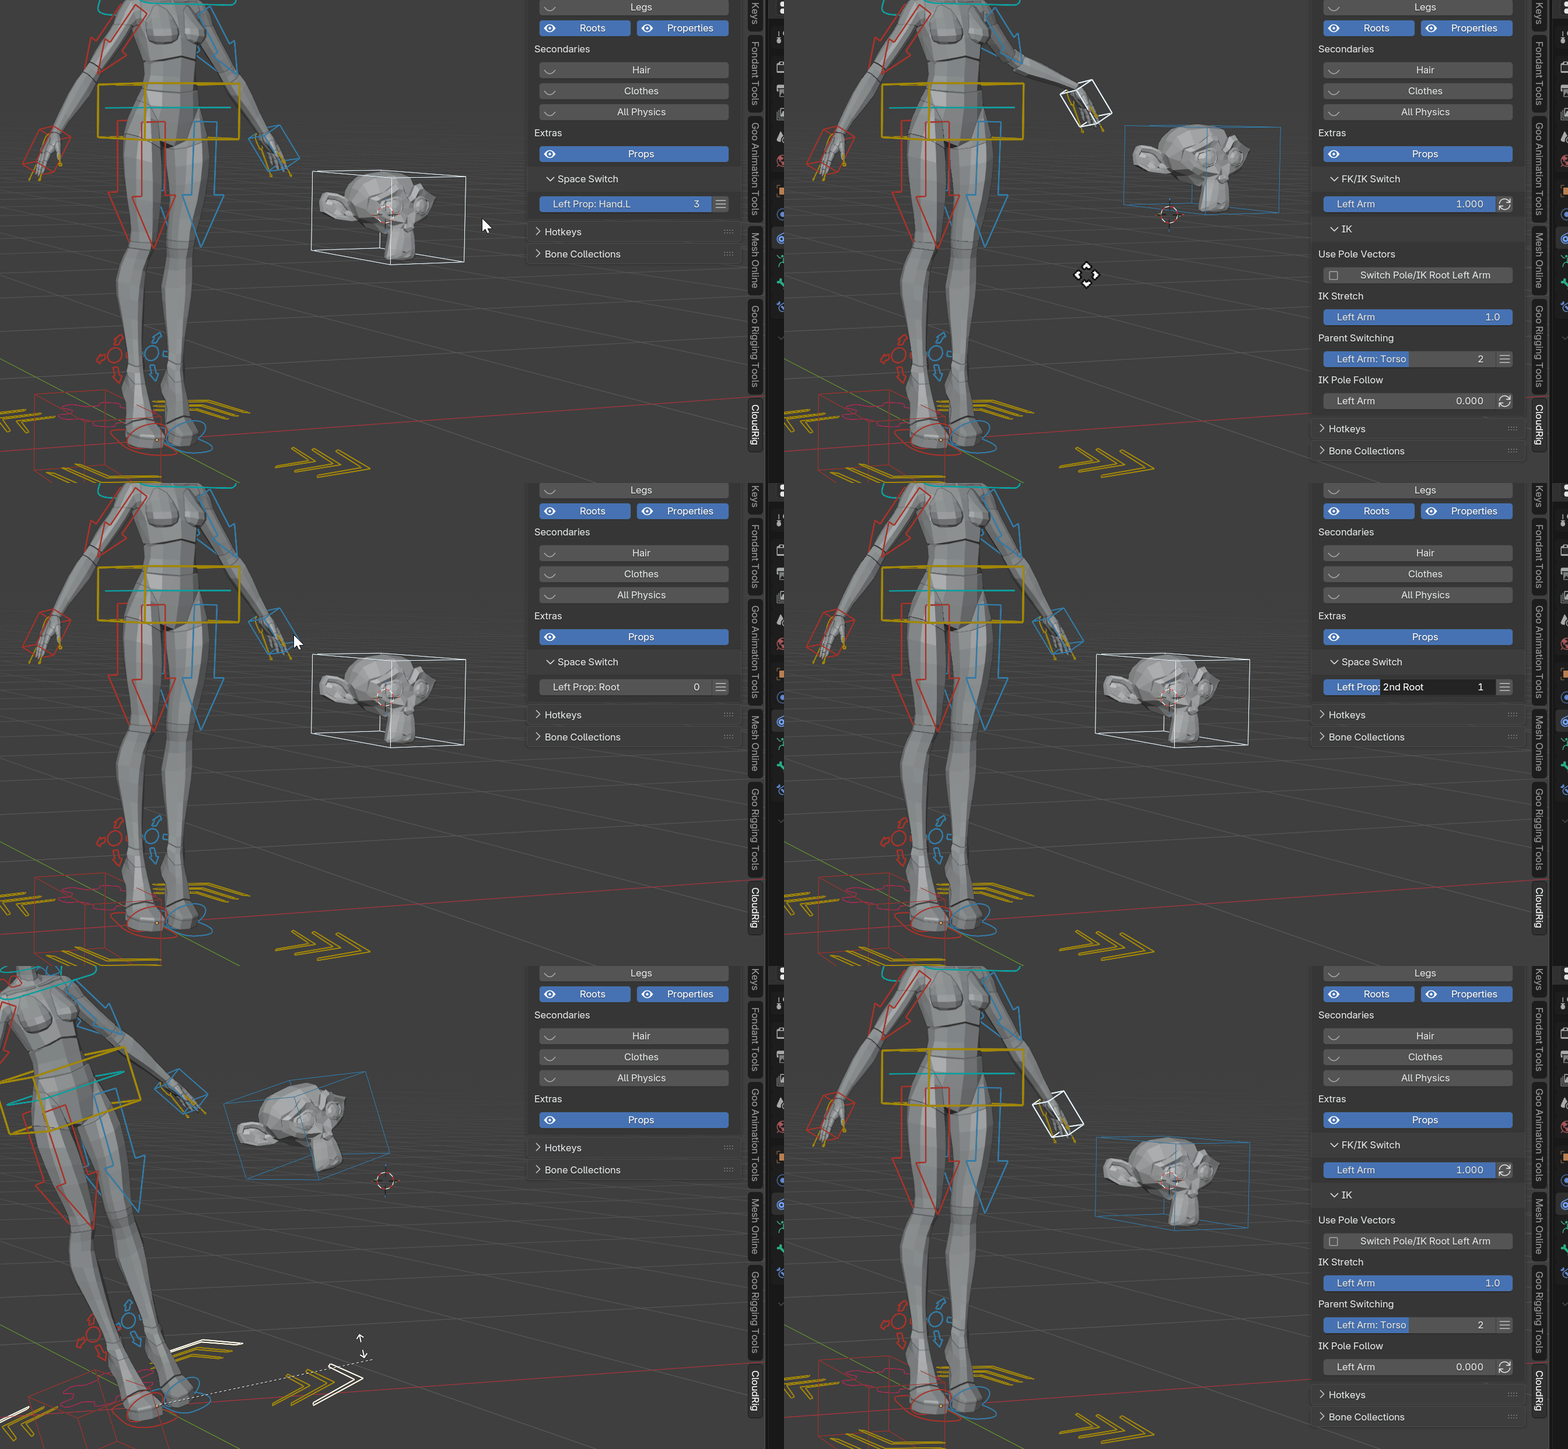
With the Prop bone selected, you can access its parent switching in this menu in the Rig UI.
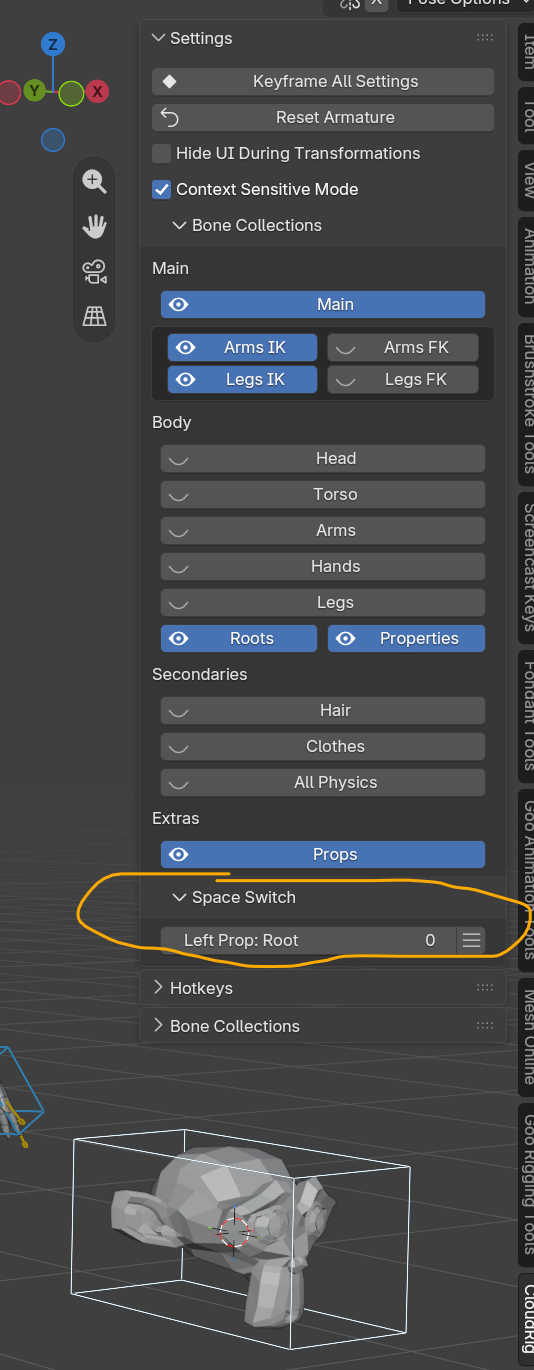
You can slide the slider to select a new parent
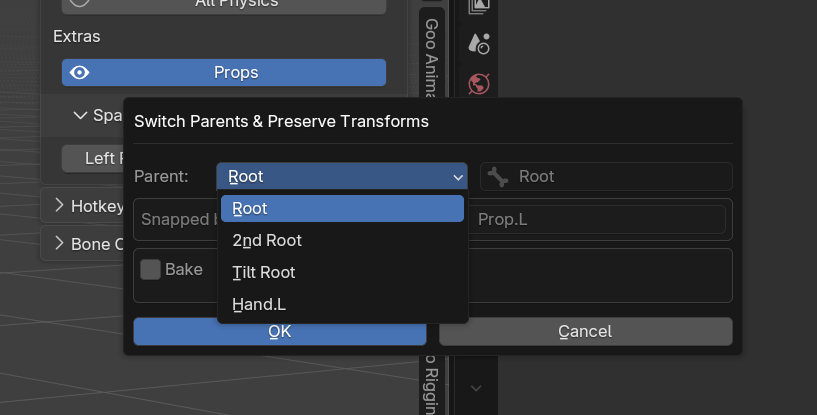
You can also click the hamburger menu on the end of the slider to access the bake option, which will change the object's parent from one bone to another and bake all the previous transforms into the new space.
Face Rig How to
Mouth/Jaw Controls
Phoneme Control - (Blue)
This sphere control morphs the mouth into different phonemes. The phonemes are labelled on the controller for reference.
- Y-axis up: MBP
- Y-axis down: O
- X - axis left: EE
- X - axis right: U
- Z - axis forward: OO
- Z - axis back - FV
- Scale Y: CH
- Scale x: Tounge extrusion
Jaw Primary - (Green)
This controls the overall jaw movement.
- Any axis: Moves the jaw without affecting the mouth
Jaw ACT - (Blue)
This is a macro for opening and closing the jaw.
- Y-axis: Opens and closes the jaw
- X-axis: Twists the jaw
Mouth Primary - (Green)
- Outer controls: Move the lips as a whole
- Inner controls: Adjust more granular parts of the lips; corners, tips etc
Mouth Secondary - (Red)
These controls position the mouth on the face.
- Any axis: Moves the placement of the whole mouth
Stretch - (Yellow)
These are tweak controls for fine-tuning. The jaw and lips have their own chains.
- Move in pairs: Especially at the chain ends, where stretch bones can resize areas drastically
- Y-axis scale: Controls the tangent of the deformation bones
Mouth - (Orange)
Controls for the teeth and tounge
- Any axis: Moves the placement of the bottom/top teeth and tongue
- The tounge also has a minor stretch layer
Eye Controls
ACT - (Blue)
This is a macro for the eyelid action constraints. Each eyelid has a separate top and bottom control, and moving them together works seamlessly.
- Y-axis toward the eye: Blinks the eyelid
- Y-axis away from the eye: Widens the eyelid
Primary - (Green)
This controls the iris independently of the eye target aiming system, and is used to fine-tune iris position at any angle. Its children include a pupil control (only on models with a separate pupil) and highlight controls.
- Any axis: Fine-tunes the iris position
Eye Target - (Green)
These controls sit in front of the face and aim the eyes.
- Master target (large rectangle): Controls the position of both eyes
- Individual eye target, move: Controls that eye's position
- Individual eye target, scale: Controls the iris scale
Stretch - (Yellow)
These are standard stretch bones, with no alternative behaviours from other stretch bones. Each eyelid is made of two chains, with the chain ends marked by half spheres.
- Caution: Don't pull these too far from the preceding bone, as the heavy scaling warps the weighting
Eyebrow Controls
ACT - (Blue)
This is a macro for the eyebrow action constraints. Combining axes produces a wide range of poses.
- X-axis: Adjusts the horizontal angle of the eyebrow
- Y-axis: Adjusts the bend of the chain
Primary - (Green)
This is the master control for the entire eyebrow bone chain.
- Any axis: Moves the whole chain as one
Stretch - (Yellow)
These are standard stretch bones, with no alternative behaviours from other stretch bones.
Eyebrow Stretch - (Purple)
This controls the secondary chain, which is deformed by the primary chain but deforms only the eyebrow mesh, not the face.